Create a Part and Characteristic
Introduction
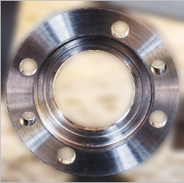
- The Part is the physical item you are inspecting, such as this A-50CS metal ring.
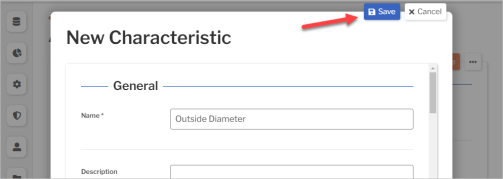
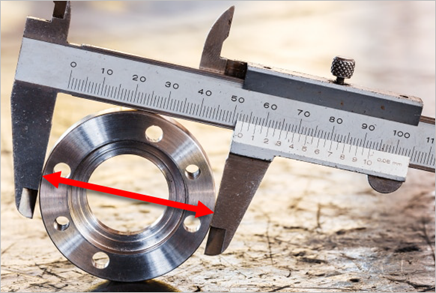
- A Characteristic is the dimension or property you are measuring, such as this Outer Diameter. You will typically measure several characteristics on a part.
You need to set up a part and characteristic before you can enter measurement data. Here's how:
A. Create a Part
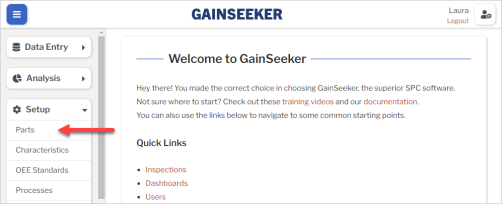
- On the navigation menu
 , expand the Setup
  section. Then select Parts.
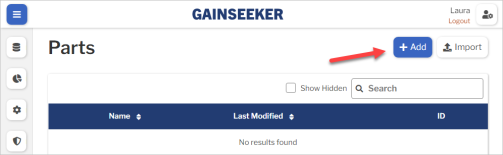
- Select the Add button to create a new part.
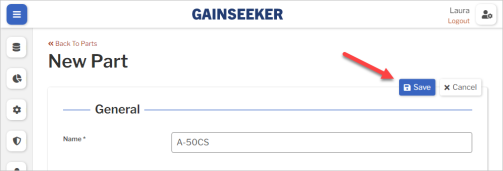
- Enter the Name of your part.
- This might be a part number, SKU, or any other way you can identify a specific part.
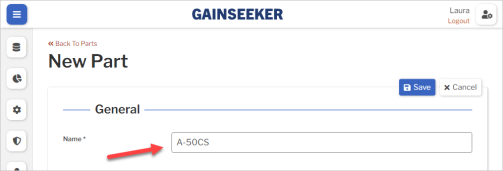
- Select the Save button at the top or bottom of the page to save your new part.
B. Create a Characteristic
After the part is saved, you can create Characteristics for that part.
1. Add the new Characteristic
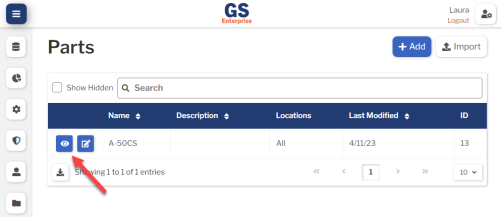
- On the list of Parts, select the View
 button for your new part.
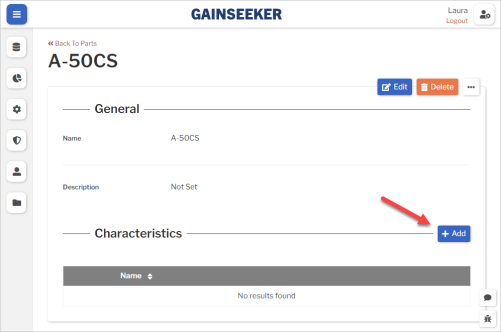
- Select the Add button to create a new characteristic.
 Pro tip: On the navigation menu , you can also expand the Setup section to add characteristics to parts.
2. Set the Required fields
Set these required fields: Name, Subgroup Size, Unit of Measure, Display Format
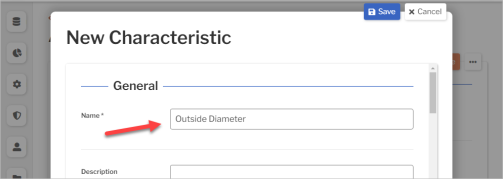
Name
Enter the Name of the characteristic.
This is one dimension or property that you are measuring on this part.
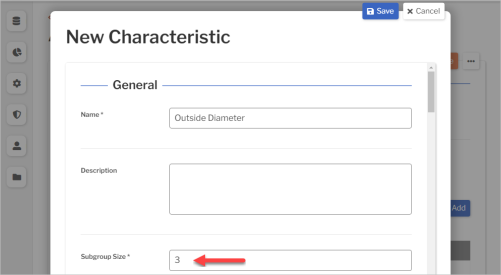
Subgroup Size
Each time you inspect this characteristic on this part, this is the number of physical parts you will measure.
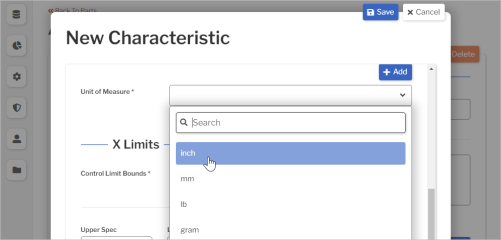
Unit of Measure
Select the Unit of Measure list.
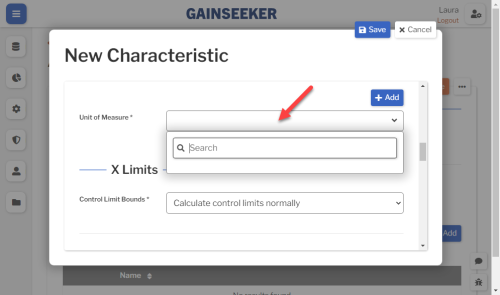
- If the unit you need isn't listed, select the Add button and enter the new Unit of Measure.
- Pro tip: On the navigation menu , you can also expand the Setup section to add measurement Units to this list.
- Otherwise, select the unit you need.
Display Format
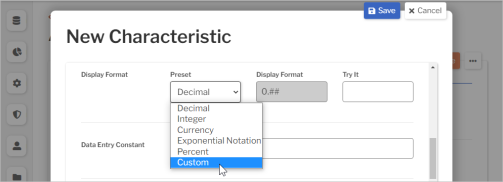
If you will record more than 2 decimal places for this characteristic's data:
- Scroll to Display Format. Select the Preset list and choose Custom.
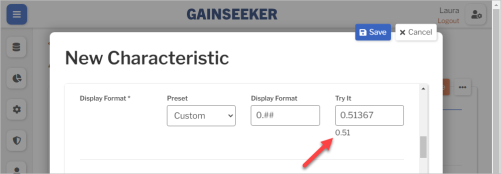
- Type a measurement in the Try It box and view the result.
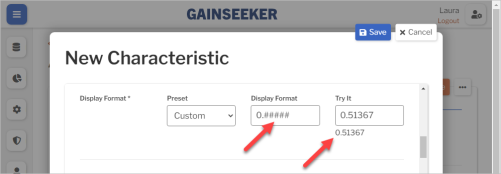
- To add decimal places, append more # symbols in the Display Format box.
3. Set the Optional fields
Set any of these optional fields (most frequently used): Real Time Failure Groups, Specification Limits, Fixed Control Limits
Real Time Failure Groups
To be alerted when this characteristic is out of control, out of spec, and so forth, select Real Time Failure Groups.
Each Real Time Failure Group is a collection of real-time checks.
After creating a real time failure group, you can apply it to any characteristic — not just the one you are creating now.
- To create a new real time failure group:
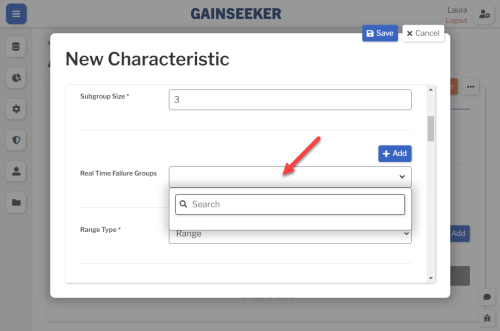
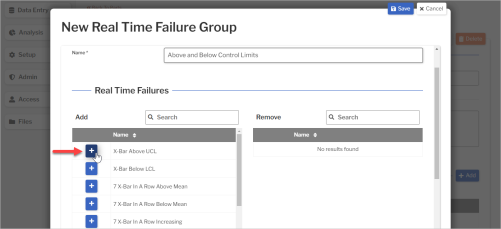
- Select the Add button to create a new real time failure group.
- Pro tip: On the navigation menu , you can also expand the Setup section to add failure groups to this list.
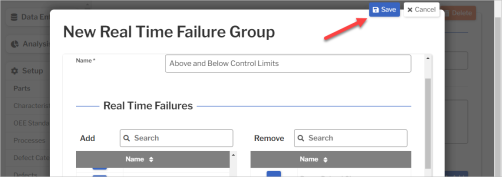
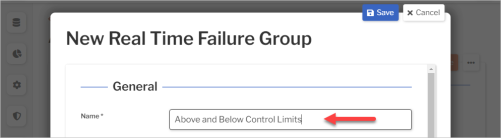
- Enter a Name for this real time failure group.
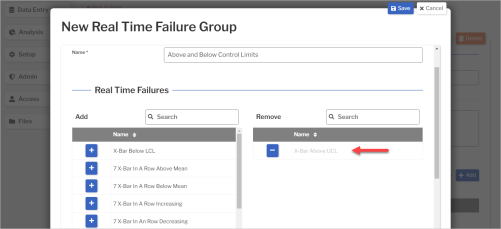
- In the Real Time Failures section, select
 to add a real-time check to this group.
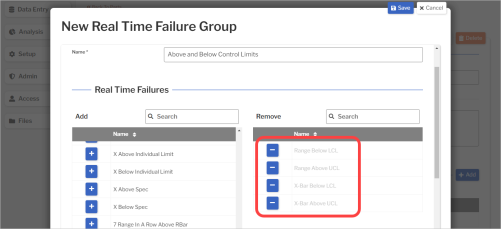
- Add other real-time checks for the group.
- When finished, select the Save button at the top or bottom of the page.
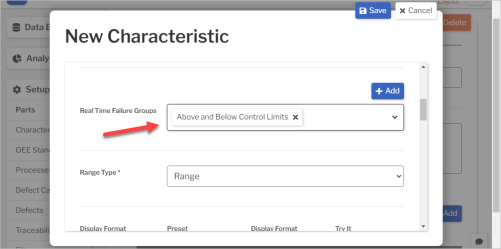
- The new real-time failure group is applied to your new characteristic.
- Select the Add button to create a new real time failure group.
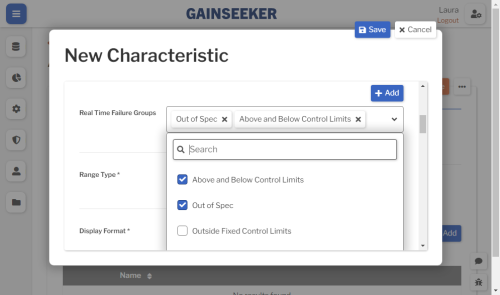
- To choose existing real-time failure groups for this characteristic, select the Real Time Failure Groups list and select the failure groups you need.
Specification Limits
- Entering specification limits lets you check for real time specification failures, calculate statistics like Cpk, and more.
- You can enter these limits — Upper Spec and Lower Spec — in the X Limits section.
 If you have a unilateral (one-sided) specification, just enter the limit you have and leave the other limit blank.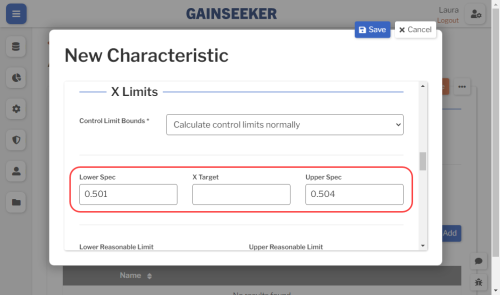
Fixed Control Limits
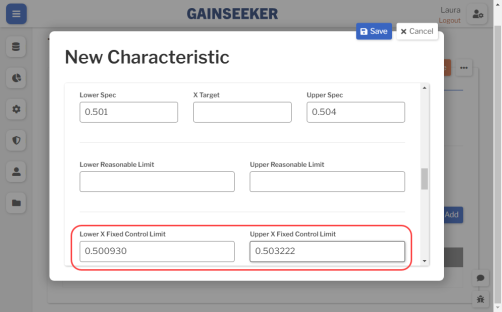
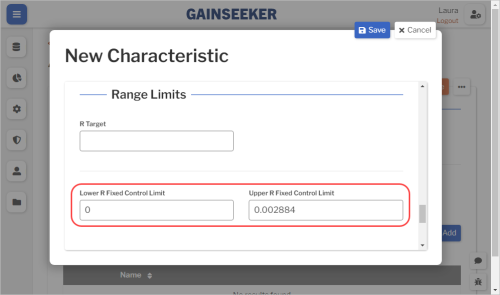
- If you have already established control limits for this characteristic, GS can use them for real-time failure checks, charts, and more.
- You can enter the X-bar (or X) control limits in the X Limits section and the Range (or Moving Range) control limits in the Range Limits section.
4. Save the Characteristic
Select the Save button at the top or bottom of the page to save your new characteristic.