Data Canvas Test
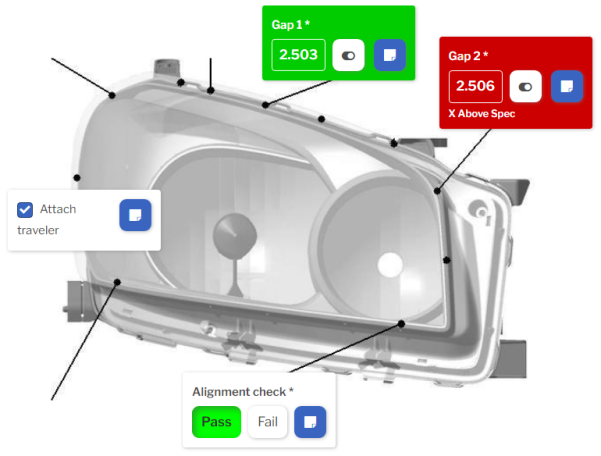
You can use the Data Canvas to enter data directly on an image of a part or process.
![]() The Data Canvas Test is not available in GS Essential.
The Data Canvas Test is not available in GS Essential.
Quick Steps to use the Data Canvas
If you want to use a Data Canvas:
- Add this Test to the sub-inspection and set its Background Image property.
- Add Data Tests. Label Tests, and Input Tests by dragging and dropping a new Test from the toolbar or an existing Test from the Sub-Inspection onto the Data Canvas.
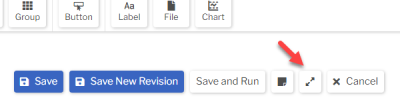
- Select the Expand button
 to display the full-sized Sub-Inspection (without the Test Settings panel).
- On the Data Canvas, drag the Tests to the locations where you want to display them to the data entry inspector.
- When finished, select the Collapse button
 to display the Test Settings panel again.
Test Settings
Label
The label displayed above this Test.
You can translate this into another language (Spanish or English).
Visible
When this Test is not Visible, neither the Data Canvas nor any of the Tests attached to it will be displayed to the data entry inspector.
Script ID
This is used by Inspection Scripts to identify this Test.
Background Image
You can select an image file, upload a new image file, or leave this blank.
Border
Add borders to the edges of this Test.
Freeze Test
If this Test is placed on the same row as a longer Test, it will not scroll off the screen until the longer Test scrolls off the screen.
Aspect Ratio
GS will size the Background Image to match the width of the Data Canvas Test and will set its height based on the image's Aspect Ratio of height to width.
You can change the height of the image by setting this property to a different number (calculated as height ÷ width).
Snap To Grid
This can make it easier to align Tests on the Data Canvas by snapping them to a 1-pixel grid (hidden).
Translating text into another language
To translate a text field into another language (Spanish or English), select its Translate ![]() button.
button.
![]()
Enter your translated text, then select the Save button at the top or bottom of the window.
![]()
For more information on translating text fields and changing the language displayed to the user, see Custom Translations.