Sub-Inspections
Introduction
A Sub-Inspection is one page of data entry Tests that will be stored in GS when the data entry inspector Submits the sub-inspection.
Every Inspection contains one or more Sub-Inspections, and every Sub-Inspection contains one or more Tests.
Best Practices
When planning how many Sub-Inspections to use in an Inspection, consider factors such as:
- Logical groups of Tests.
- Tasks that must be performed in a particular order.
- For example, you might create a Sub-Inspection for each major step in an Assembly process.
- The length of each data entry page.
- For example, you might try to limit each Sub-Inspection to the number of Tests that fit on a typical screen without needing to scroll up or down.
- Fixtures that use multiple Serial Devices to simultaneously measure multiple Characteristics on each Part.
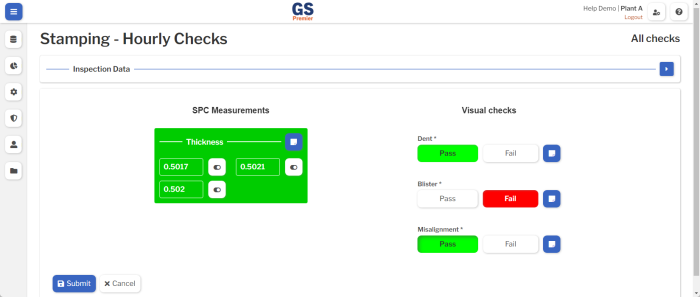
- All of the SPC Measurement Tests for these Characteristics should be added to the same Sub-Inspection.
Adding Tests to a Sub-Inspection
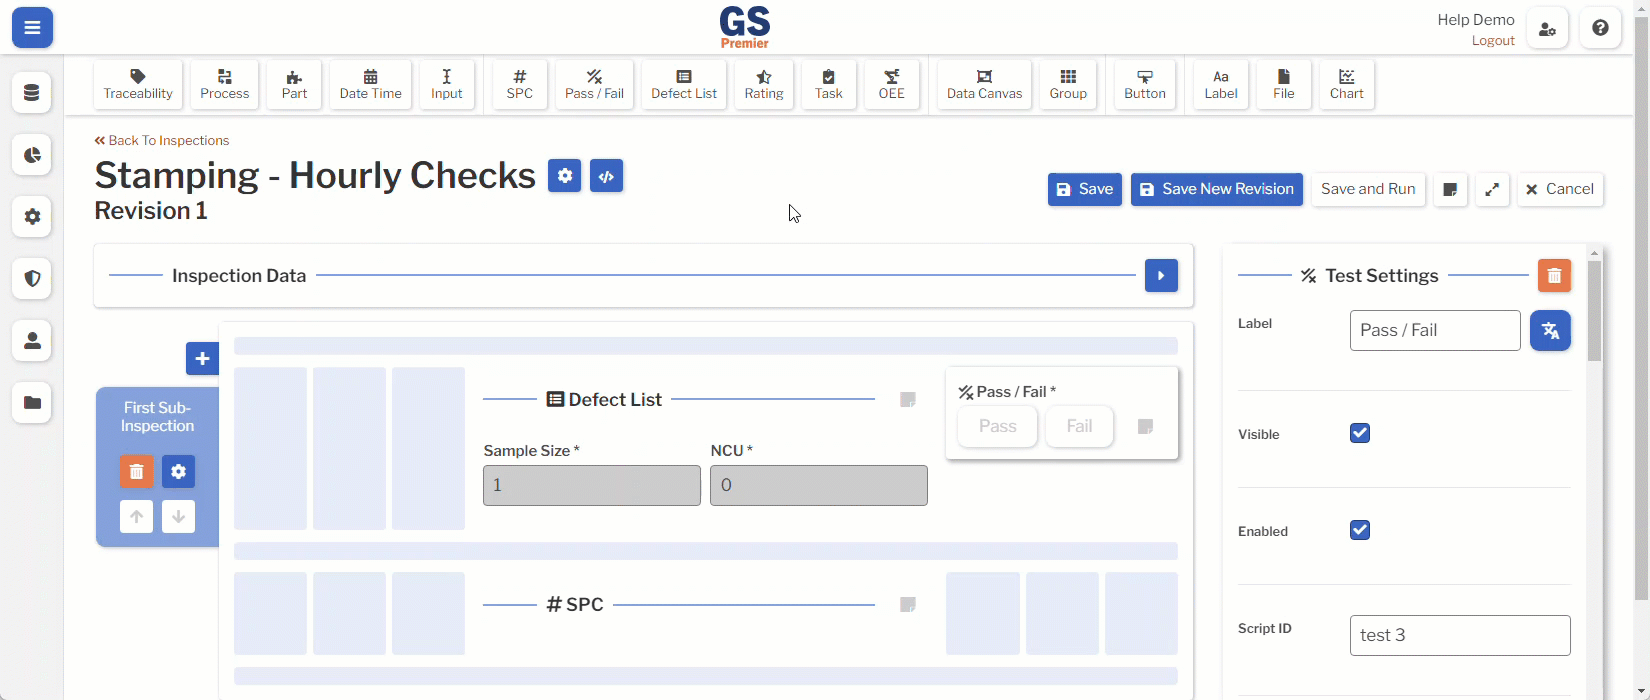
- (On a PC or tablet): Select the Test you want to add. It will automatically be added to the current Sub-Inspection.
- (On a PC only): Alternatively, you can drag the Test and drop it on a blue placeholder:
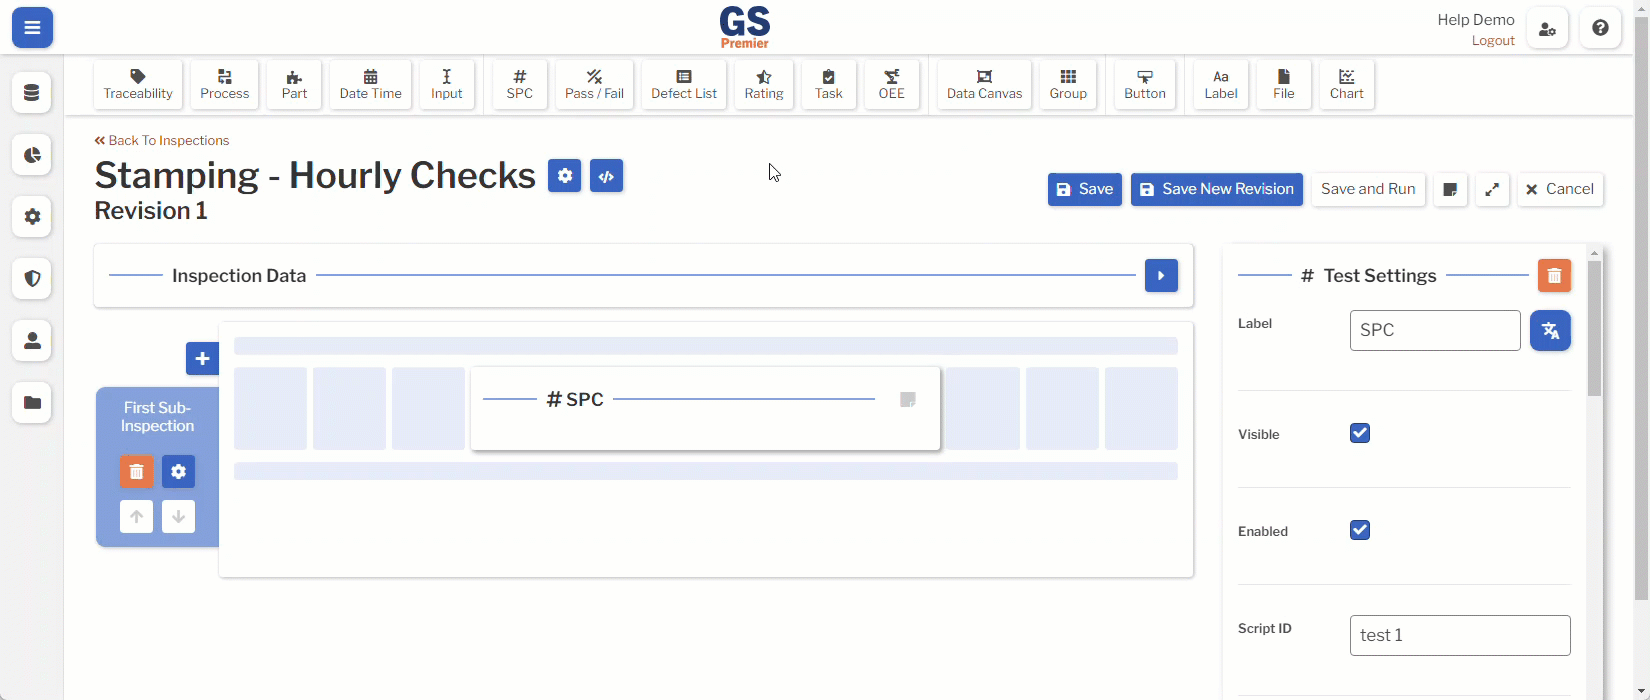
Arranging Tests on a Sub-Inspection
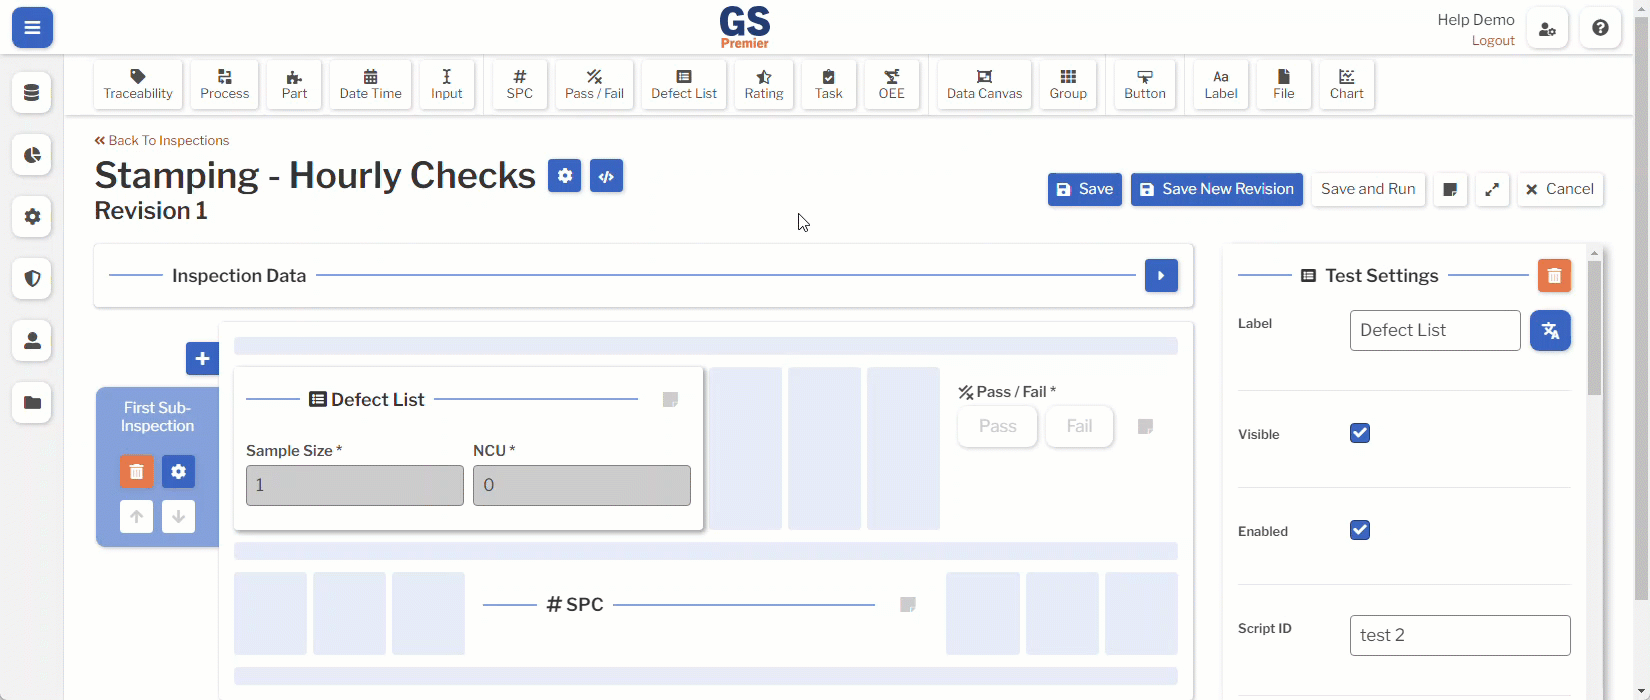
(On a PC only) You can move and resize the Tests on the current Sub-Inspection as desired.
- To move a Test, drag it to any blue placeholder.
- To resize a Test, click and drag the left or right edge to the desired width. The Test will automatically adjust to fill the nearest blue placeholder.
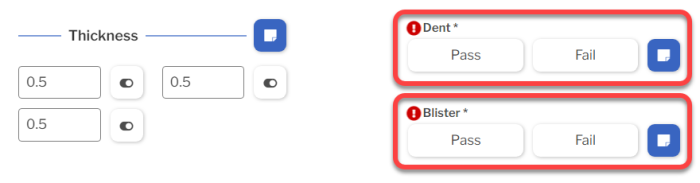
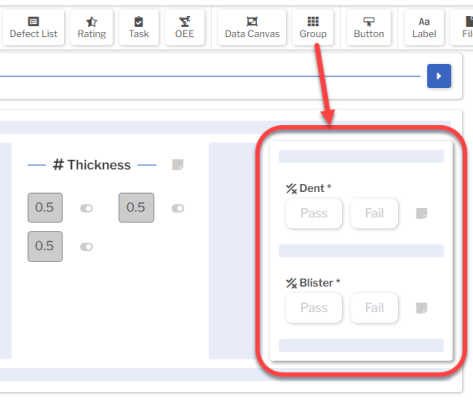
- If you need to stack multiple Tests on one row like this example, add a Group Test to the row and then stack your Tests in that Group.
-
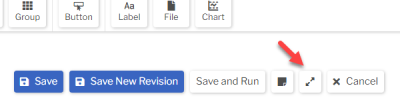
 Pro tip: Before arranging Tests on the Sub-Inspection, select the Expand button
  to display the full-sized Sub-Inspection (without the Test Settings panel).
-
-
When finished, select the Collapse button
 to display the Test Settings panel again.
-
Adding, Deleting, and Moving Sub-Inspections
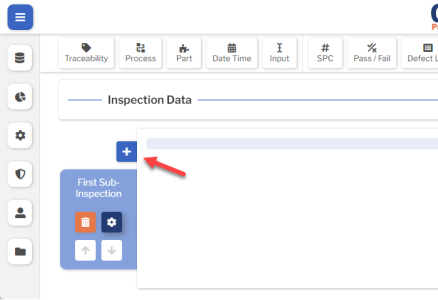
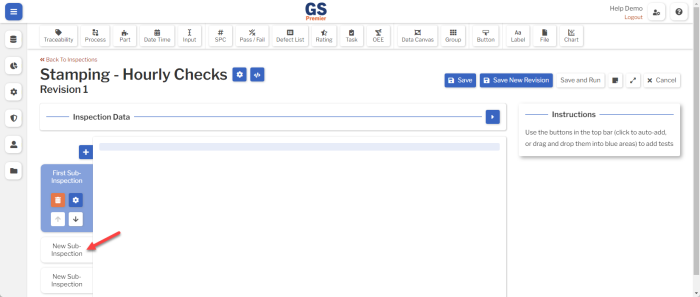
- To append a new Sub-Inspection, select the Add Sub-Inspection button
 .
.
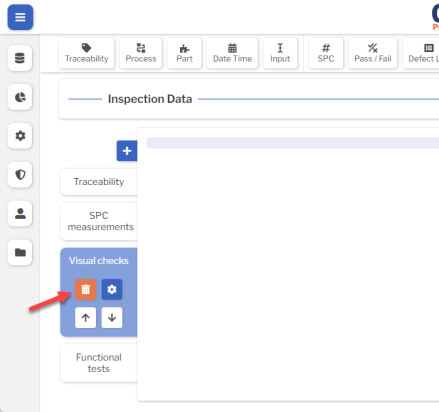
- To delete a Sub-Inspection, select the Delete Sub-Inspection button
 .
.
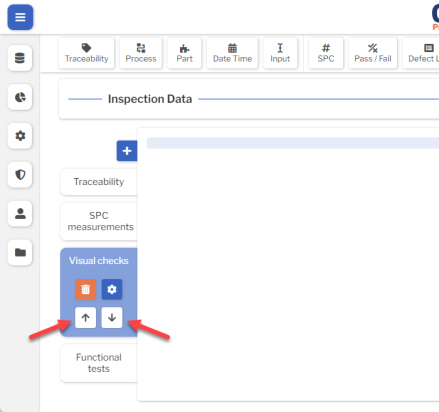
- To move a Sub-Inspection, select the Move Up or Move Down button.
Changing the Sub-Inspection Name and other settings
To change the Sub-inspection name and other settings:
- Select the tab for the desired Sub-Inspection.
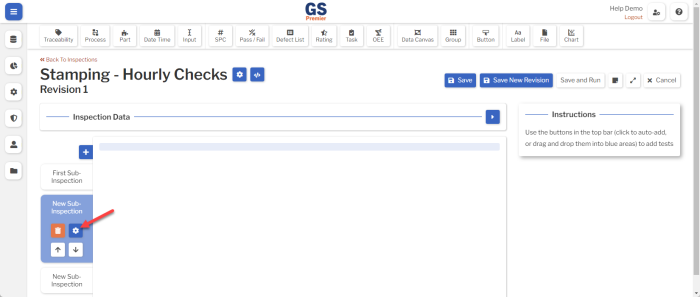
- Select the Edit Sub-Inspection button
 to change the Sub-Inspection's settings.
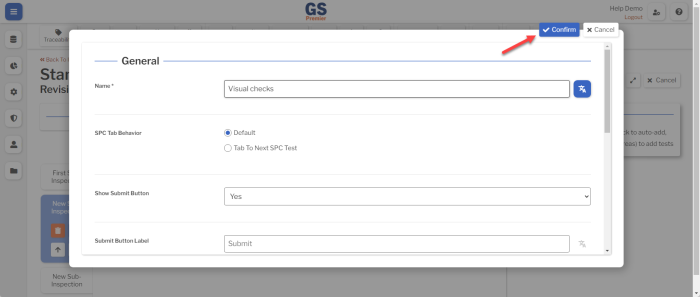
- When finished, select the Confirm button
 at the top or bottom of the page.
Sub-Inspection settings
Name
The name displayed for the Sub-Inspection.
You can translate this into another language (Spanish or English).
SPC Tab Behavior
On a Sub-Inspection with multiple SPC Measurement Tests, this determines what happens when you finish one measurement.
- Default : Pressing the TAB key or finishing input from a Serial Device will move to the next field in the current SPC Measurement Test.
- This makes it easy to measure all Characteristics on the first part, then all Characteristics on the second part, and so forth.
- Tab to Next SPC Test : Pressing the TAB key or finishing input from a Serial Device will move to the next field in the next SPC Measurement Test.
- This makes it easy to measure the first Characteristic on all of the parts in your subgroup, then the second Characteristic on all parts, and so forth.
Note Button
This setting can display or hide a Note button next to the Submit button on the Sub-Inspection. The Sub-Inspection Note applies to all Tests that store data on the Sub-Inspection.
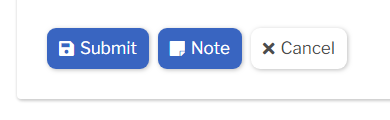
This setting determines whether GS requires the data entry inspector to enter this Note before submitting this Sub-Inspection, makes this Note optional, or hides this Note button. You can also set this to use the Inspection Setting for the note button.
Show Submit Button, Show Cancel Button
These settings determine whether to show or hide the Submit button and the Cancel button on this Sub-Inspection.
Submit Button Label, Cancel Button Label
You can use these settings to change the text displayed on the Submit and Cancel buttons.
You can translate these labels into another language (Spanish or English).
Visible in List
To hide this Sub-Inspection from the list of Sub-Inspections displayed to the data entry inspector, select No.
Next Sub-Inspection
When this setting is blank, Submitting this Sub-Inspection will display the list of Sub-Inspections to the data entry inspector.
You can change this setting to automatically load a Sub-Inspection when the data entry inspector Submits this Sub-Inspection.
This is used by Inspection Scripts to identify this Sub-Inspection.
Translating text into another language
- To translate a text field into another language (Spanish or English), select its Translate
 button.

- Enter your translated text, then select the Save button at the top or bottom of the window.
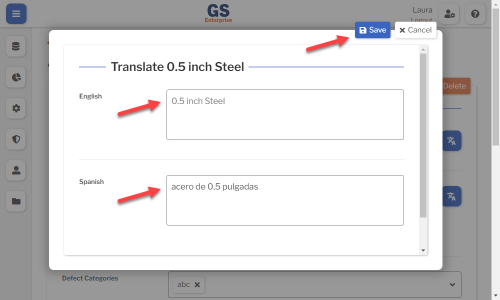
- For more information on translating text fields and changing the language displayed to the user, see Custom Translations.