Set up Defect Categories
- Defect Categories are used in Inspections.
- A Defect Category can contain Defects OR Defect Categories, so you can create a hierarchy of Defect Categories and present any level of those categories to the inspector.

- To set up a hierarchy of Defect Categories:
- First, create an empty Defect Category (with no Defects) to be the Parent.
- Then set other Defect Categories — with or without Defects — to identify that empty Defect Category as their Parent.
- First, create an empty Defect Category (with no Defects) to be the Parent.

Creating, editing, or viewing Defect Categories
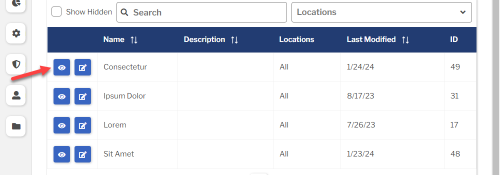
To create, edit, or view a Defect Category:
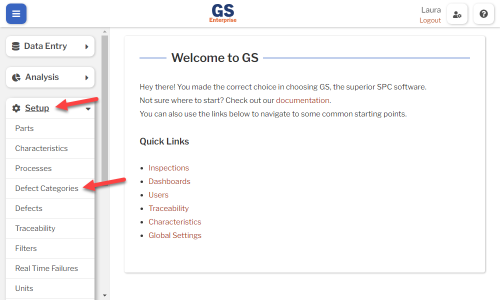
- On the navigation menu
 , expand the Setup
  section. Then select Defect Categories.
- This displays a list of all the Defect Categories.
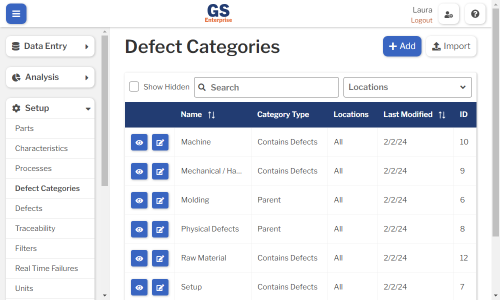
- To create a Defect Category, select the Add button.
- To edit a Defect Category, select the Edit
 button for that Defect Category.
 - To view a Defect Category, select the View
 button for that Defect Category.
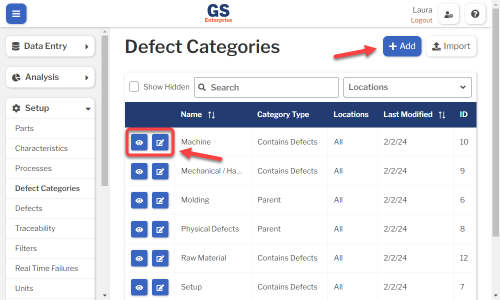
- To edit a Defect Category, select the Edit
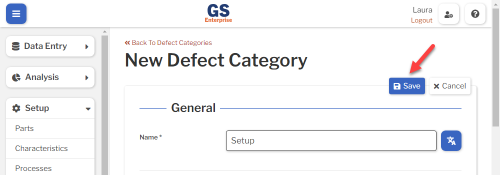
- Set or change the Required settings (below) for that Defect Category.
- Set or change the Optional settings (below) for that Defect Category.
- Select the Save button at the top or bottom of the page to save your changes.
Required settings
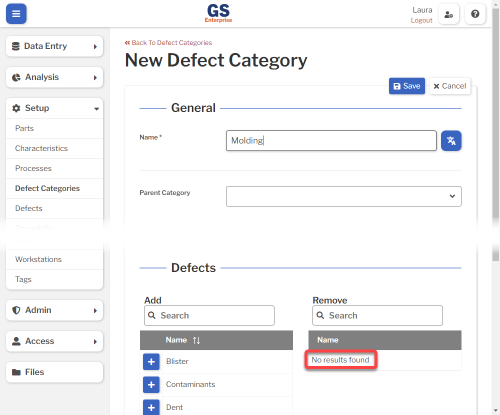
Name
- Each Defect Category must have a unique name.
- You can translate this into another language (Spanish or English).
Optional settings
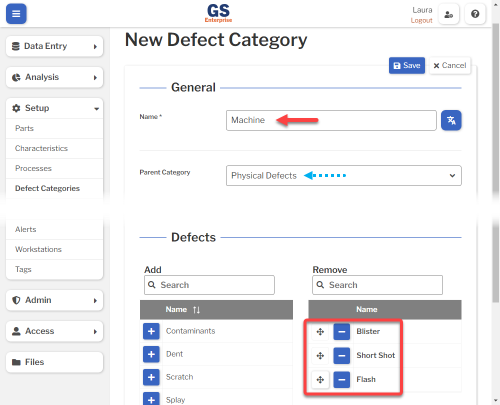
Parent Category
- If you want this to be a subcategory of a Parent Category, select that Parent here.
- A Parent category can be any category without Defects.
- You can select a Parent category even if you want this category to be a Parent to other subcategories.
- Otherwise, leave this blank.
Locations
- If you want to limit which Locations can access this Defect Category, select them here.
- To let all Locations access this Defect Category, leave this blank.
- * Not shown if you only have one Location.
- * Not shown in GS Essential.
Hide in Lists
- When a Defect Category is no longer active, you can set Hide in Lists to Yes.
- This will hide the Defect Category from all lists of Defect Categories in GS, while preserving any data that was already entered for this Defect Category. Users can still enter data for a hidden Defect Category if existing Inspection properties or Test properties specify this Defect Category.
- If you have hidden a Defect Category, you can always view it again by selecting the Show Hidden checkbox.
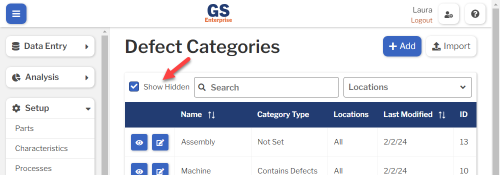
- To un-hide a Defect Category, set Hide in Lists to No.
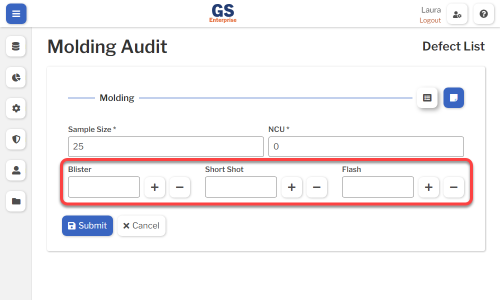
Defects
- If you want this to be a Parent category, don't select any Defects.
- Otherwise, add the Defects you want in this category.
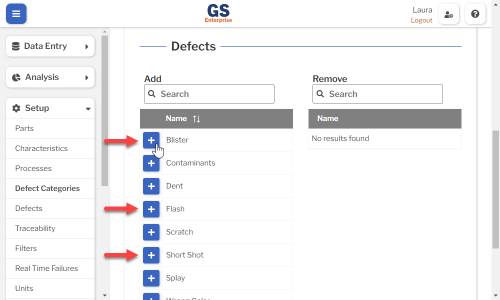
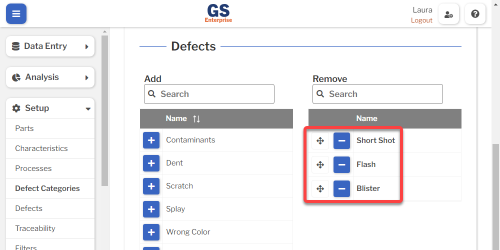
- You can use the Move
 button to drag a Defect to a different position in the list.
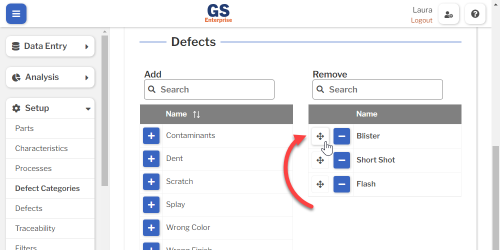
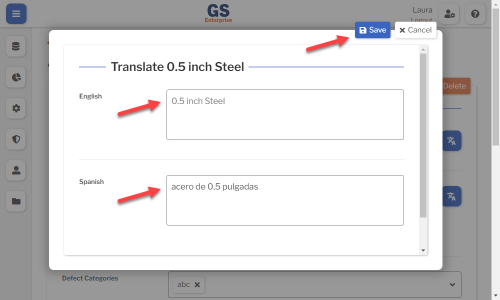
Translating text into another language
- To translate a text field into another language (Spanish or English), select its Translate
 button.

- Enter your translated text, then select the Save button at the top or bottom of the window.
- For more information on translating text fields and changing the language displayed to the user, see Custom Translations.
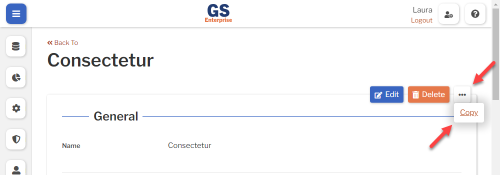
Copying a Defect Category
- You can copy a Defect Category — including all of its settings — to a new Defect Category name.
- To copy a Defect Category:
- On the list of Defect Categories, select the View button for the Defect Category you want to copy.
- Select the More Actions
 button and then select Copy.
- Enter a New Name for the new Defect Category, and then select the Copy button.
- Edit any settings for this new Defect Category.
- On the list of Defect Categories, select the View

Using a spreadsheet to create and edit Defect Categories
- You can use a spreadsheet (.csv file) to create or edit multiple Defect Categories and then import them.
- This can be much faster and easier than creating or editing those Defect Categories one at a time in GS.
Deleting a Defect Category
- When a Defect Category becomes inactive, you will typically Hide it in Lists.
- However, if the Defect Category has never been used to enter data, is not assigned to any inspections, etc., you can delete that Defect Category:
- On the list of Defect Categories, select the View button for the Defect Category you want to delete.
- Then select the Delete button
 at the top of the page.
- On the list of Defect Categories, select the View