Creating and editing Inspections
Best practice: create as few Inspections as possible
You can use these features to create one Inspection for similar Parts and Processes:
- For multiple Processes:
-
- Add a Process Test to the global tag panel, and leave the Process setting blank.
- The data entry inspector must choose the Process during data entry.
- Create a Group that limits which Processes the data entry inspector can access, and then add the data entry inspector User to that Group.
- Add a Process Test to the global tag panel, and leave the Process setting blank.
-
- For multiple Parts:
-
- Add a Part Test to the Inspection's global tag panel, and leave the Part setting blank.
- The data entry inspector must choose the Part during data entry.
- Create a Group that limits which Parts the data entry inspector can access, and then add the data entry inspector User to that Group.
- Assign Tags to all Characteristics of those Parts.
- Assign Defect Categories to all of those Parts.
- Add a Part Test to the Inspection's global tag panel, and leave the Part setting blank.
-
- For SPC Tests:
- In addition to the steps for multiple Parts (above):
-
- On the Sub-Inspection, add one SPC Test for every Tag you assigned to those Parts.
- On each SPC Test:
-
- Set the Characteristic Match Method setting to Match by Part and Tag.
- Use the Tag setting to choose a Tag that identifies what is being measured, regardless of the Part.
-
- During data entry, if the current Part does not have a Characteristic with this Tag, this Test will not be displayed.
-
- In addition to the steps for multiple Parts (above):
- For Pass/Fail Tests:
- In addition to the steps for multiple Parts (above):
-
- On the Sub-Inspection, add one Pass/Fail Test for every Defect in the Defect Categories you assigned to those Parts (above).
- On each Pass/Fail Test, select the Only Show if the Part Contains this Defect checkbox.
- If the current Part is not assigned to any Defect Categories that contain this Defect, this Test will not be displayed.
-
- In addition to the steps for multiple Parts (above):
Creating, editing, running, or viewing Inspections
You must be logged in as a User whose Role is Admin or Engineer to create, edit, run, or view an Inspection:
- On the navigation menu
 , expand the Data Entry
  section. Then select Inspections.
- Or select the Inspections link on the GS home page.
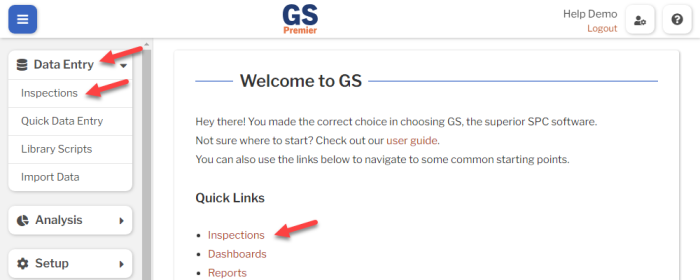
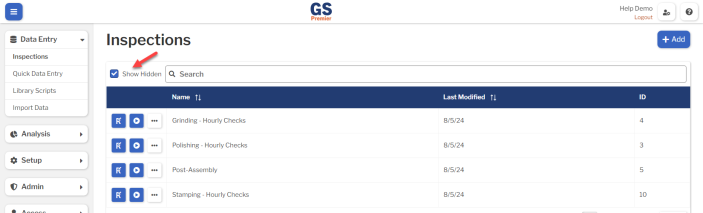
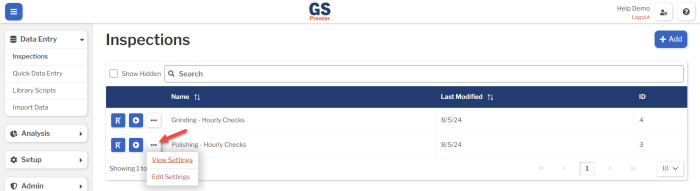
- This displays a list of all the Inspections.
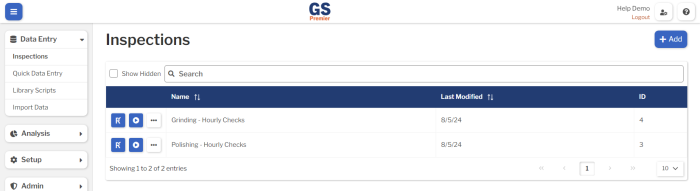
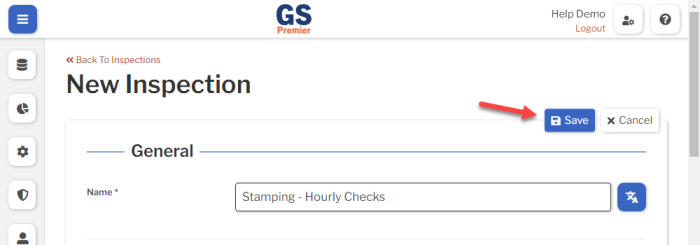
- To create an Inspection, select the Add button.
- To edit the latest Inspection Revision, select the Edit Revision
 button for that Inspection.
 - To run the latest Inspection Revision, select the Run
 button for that Inspection.
 - To view or edit the Inspection Settings, select the More Actions
 button for that Inspection.
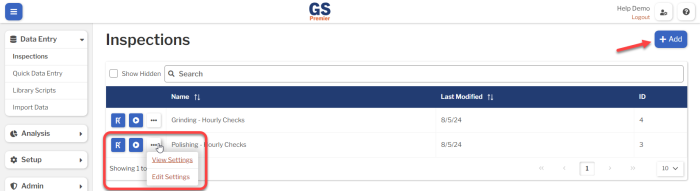
- To edit the latest Inspection Revision, select the Edit Revision
- If creating an Inspection or editing its Settings:
-
- Set or change the Required settings (below) for that Inspection.
- Set or change the Optional settings (below) for that Inspection.
- If creating a new Inspection, the settings to Publish and Schedule the Inspection are not available until you have saved an Inspection Revision.
-
- Select the Save button at the top or bottom of the page to save your changes.
- If creating a new Inspection:
-
- This creates the first Revision of this inspection and puts you on the Edit Revision page.
- You must save a Revision before you can Publish the Inspection to data entry users.
- For details, see Inspection Revisions.
- After saving a Revision, you can edit the Settings for the new Inspection to Publish it and set Inspection Schedules.
- On the list of Inspections, select the More Actions button and the Edit Settings link for the new Inspection.
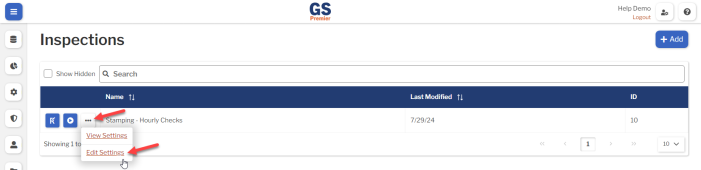
- On the list of Inspections, select the More Actions
- This creates the first Revision of this inspection and puts you on the Edit Revision page.
-
Required settings
Name
Each Inspection must have a unique name.
You can translate this into another language (Spanish or English).
Optional settings
Description
- A description or notes about this Inspection.
- It is displayed only on this Inspection Settings page.
- You can translate this into another language (Spanish or English).
Hide in Lists
- When an Inspection is no longer active, you can set Hide in Lists to Yes.
- This will hide the Inspection from all lists of Inspections in GS, while preserving any data that was already entered by this Inspection. Users can still enter data for a hidden Inspection if its Inspection Schedule is set.
- If you have hidden an Inspection, you can always view it again by selecting the Show Hidden checkbox.
- To un-hide an Inspection, set Hide in Lists to No.
Groups and Users Assignments
To assign this Inspection to only certain Groups or Users, use the Groups Assignments and Users Assignments areas to Add Groups and Add Users so they can run this Inspection.
If this Inspection is not assigned to any Groups or Users, then all Users with a Data Entry or Supervisor Role can run this Inspection. (Users with an Admin or Engineer Role can run all inspections without being assigned to them.)
Published Revision
When you have an Inspection Revision that is ready to be deployed for data entry, you must set it as the Published Revision.
![]() Users with Data Entry and Supervisor Roles can only run Inspections with a Published Revision.
Users with Data Entry and Supervisor Roles can only run Inspections with a Published Revision.
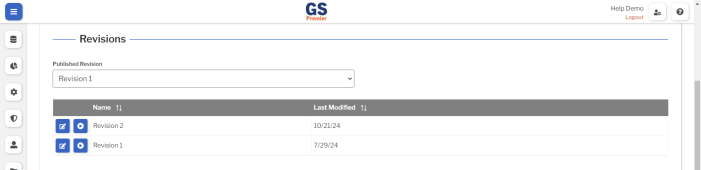
To hide the Inspection from data entry, set the Published Revision to Not Published for Data Entry.
Inspection Schedules
You can set up Inspection Schedules that requires this Inspection to be run on a regular basis. To do so, select the Add button  in the Inspection Schedules area.
With an Inspection Schedule set, GS will alert any logged-in User who can run that Inspection that it is time to enter data on that Inspection. The User can select that alert to run the Inspection.
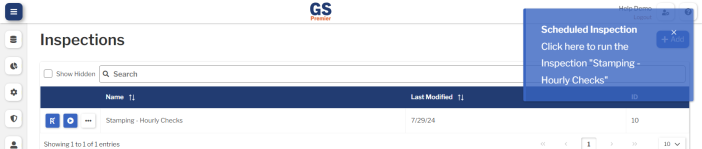
When the User selects these scheduled alerts — or fails to do so — GS will store Accountability data that lets you analyze User compliance with data entry schedules.
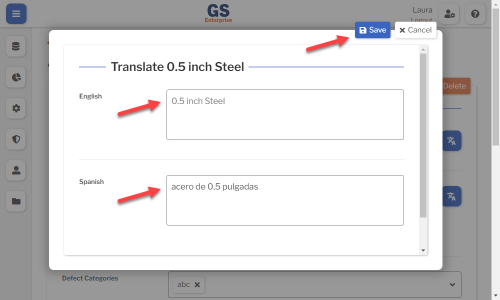
Translating text into another language
- To translate a text field into another language (Spanish or English), select its Translate
 button.

- Enter your translated text, then select the Save button at the top or bottom of the window.
- For more information on translating text fields and changing the language displayed to the user, see Custom Translations.
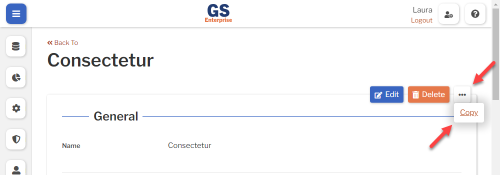
Copying an Inspection
You can copy an Inspection — including all of its settings and its latest revision — to a new Inspection name. To do so:
- On the list of Inspections, select the More Actions button and the View Settings link for the Inspection you want to copy.
- Select the More Actions button and then select Copy.
- Enter a New Name for the new Inspection, and then select the Copy button.
- Edit any settings for this new Inspection.

Deleting an Inspection
When a Inspection becomes inactive, you will typically Hide it in Lists.
However, if you are sure that the Inspection is no longer useful, you can delete it.
- On the list of Inspections, select the More Actions button and the View Settings link for the Inspection you want to delete.
- Then select the Delete button
 at the top of the page.