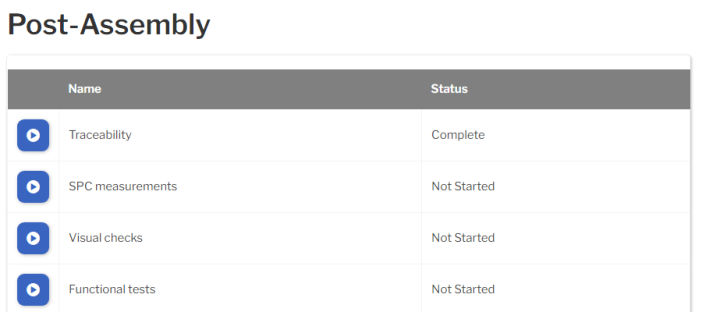
Quick steps to create an Inspection
You must be logged in as a User whose Role is Engineer or Admin to create an inspection.
Here are the basic steps:
A. Create a new Inspection and Save it
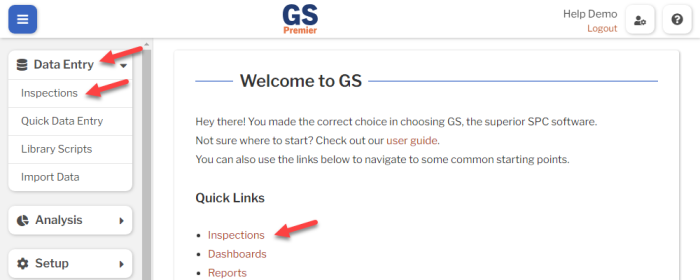
- On the navigation menu
 , expand the Data Entry
  section. Then select Inspections.
- Or select the Inspections link on the GS home page.
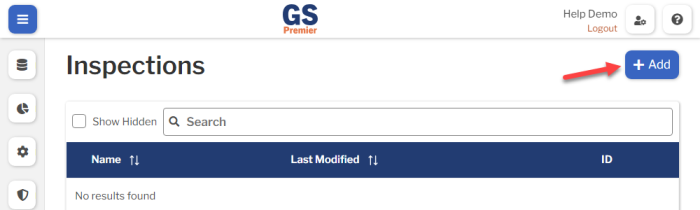
- Select the Add button to create a new inspection.
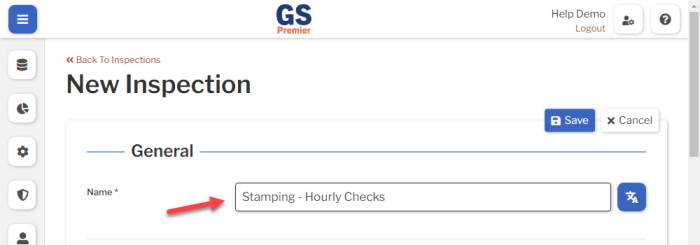
- Enter a Name for your inspection.
- Select the Save button at the top or bottom of the page to save your new inspection.
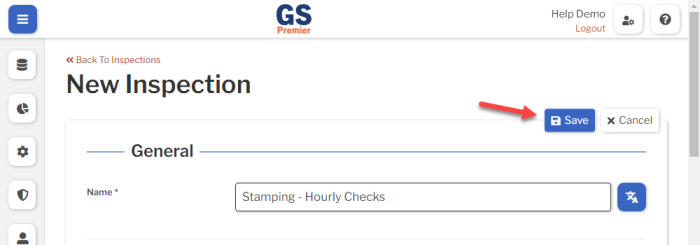
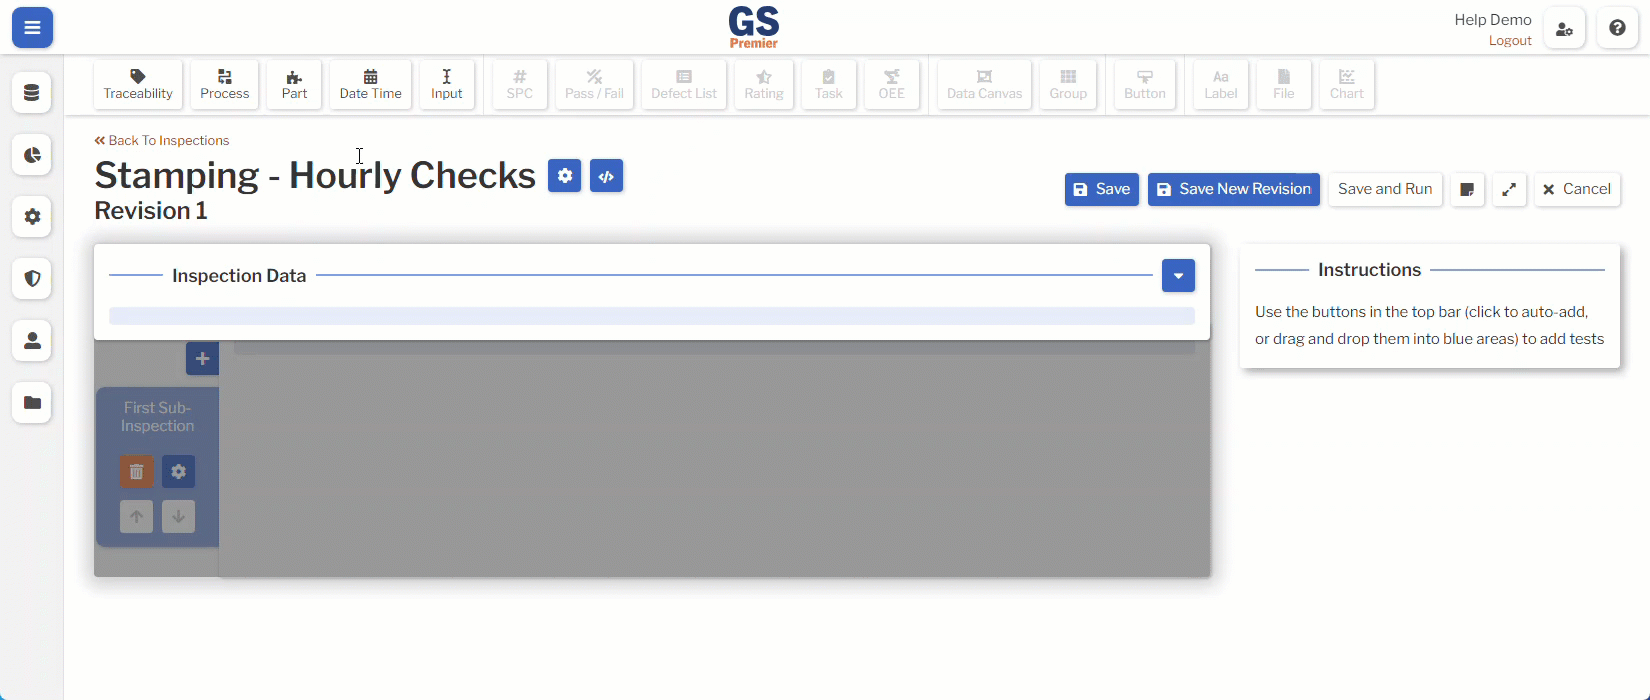
This creates the first Revision of this inspection and puts you on the Edit Revision page.
B. (optional) Add Tests to the Global tag panel
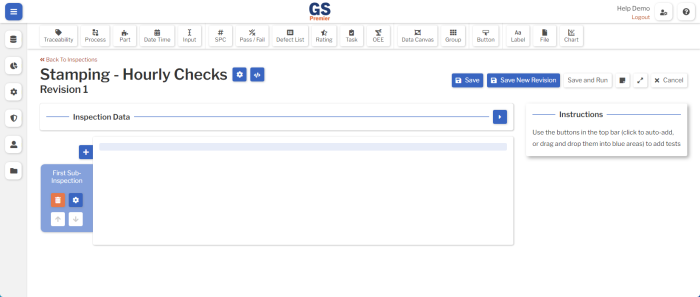
The Global tag panel — labeled Inspection Data — can be used to set Traceability, Process, Part, and Date Time values that will apply to all data submitted on this Inspection.
![]() This is typically where you set the Process and the Part for the Inspection:
This is typically where you set the Process and the Part for the Inspection:
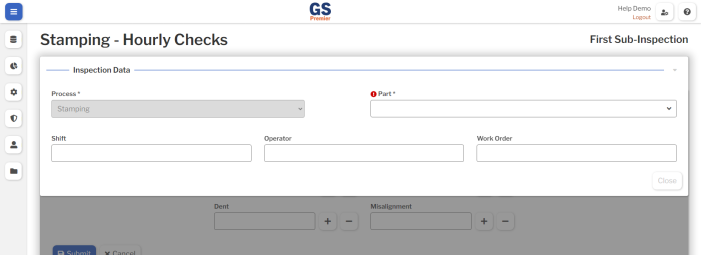
- A Process is required to store all data.
- A Part is required for SPC measurement data and optional for other types of stored data.
Tests are objects that you can place on the Global tag panel or on a Sub-Inspection.

For detailed information about each kind of Test and its settings, see Tests Overview.
If you add Tests to the Global tag panel, GS can prompt the data entry inspector to enter these values before they enter any data.
To begin:
- Select the Inspection Data panel.
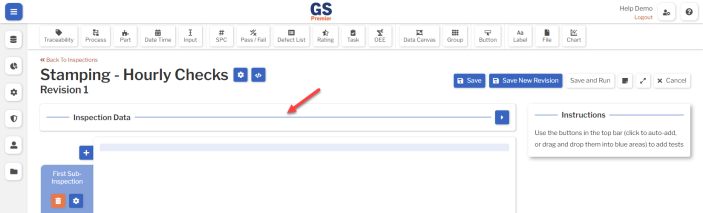
- This opens the Global tag panel and enables any Tests that can be added to this panel.
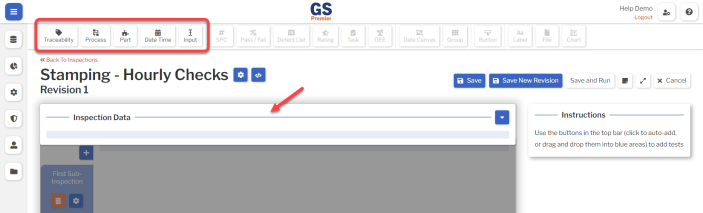
- Add Tests to the Global tag panel — typically Traceability, Process, Part, or Date Time. (The Input Test is only used with JavaScript.)
- To do so:
- (On a PC or tablet): Select the Test you want to add. It will automatically be added to the Global tag panel.
- (On a PC only): Alternatively, you can drag the Test and drop it on a blue placeholder:
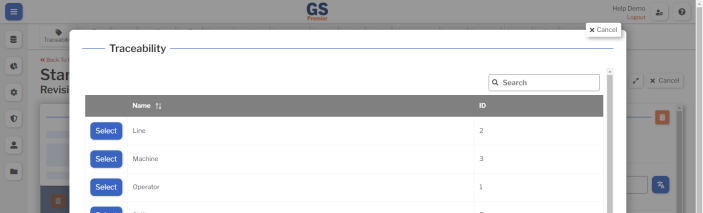
- If you selected the Traceability Test, GS will ask you to select which traceability to use.
- Repeat this step to add all of the desired Global tags.
- To do so:
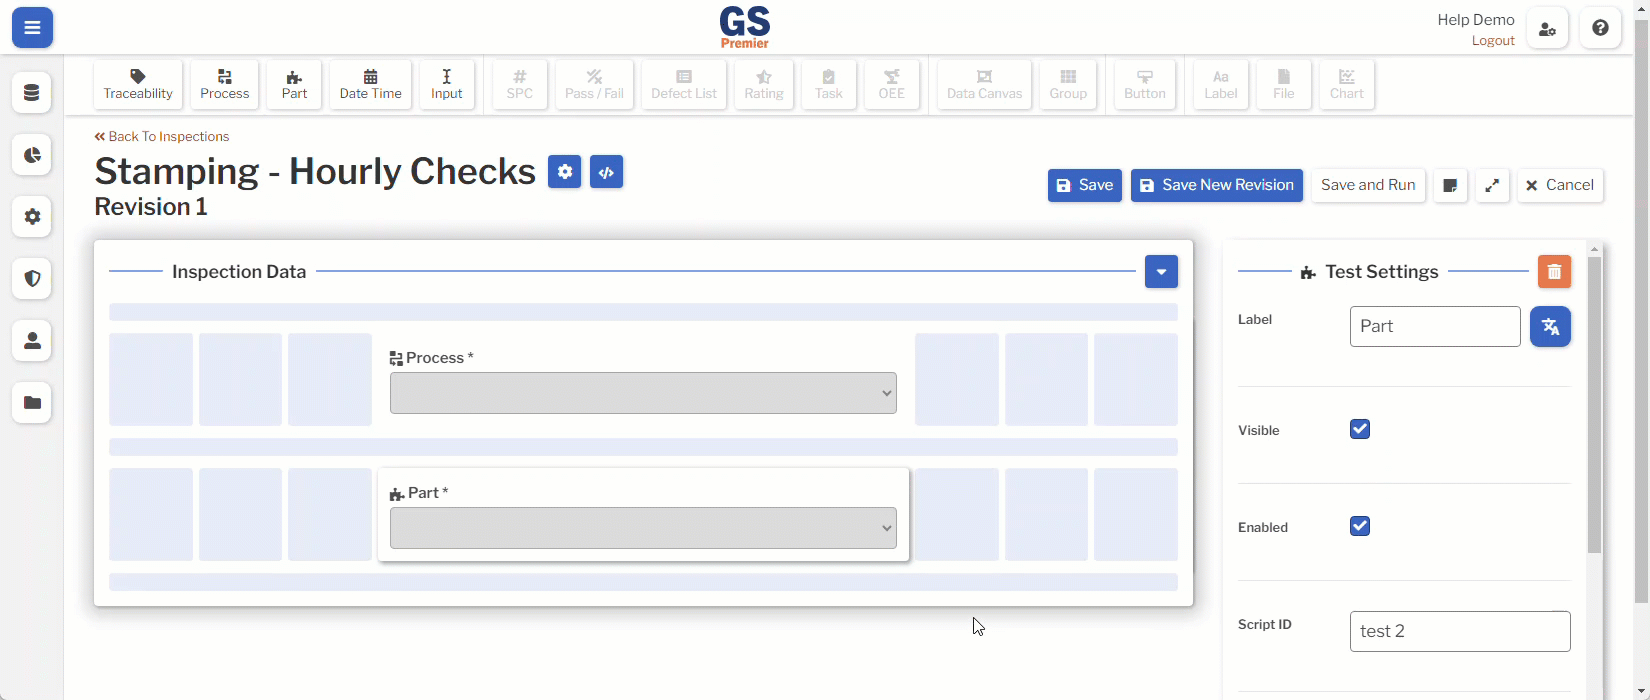
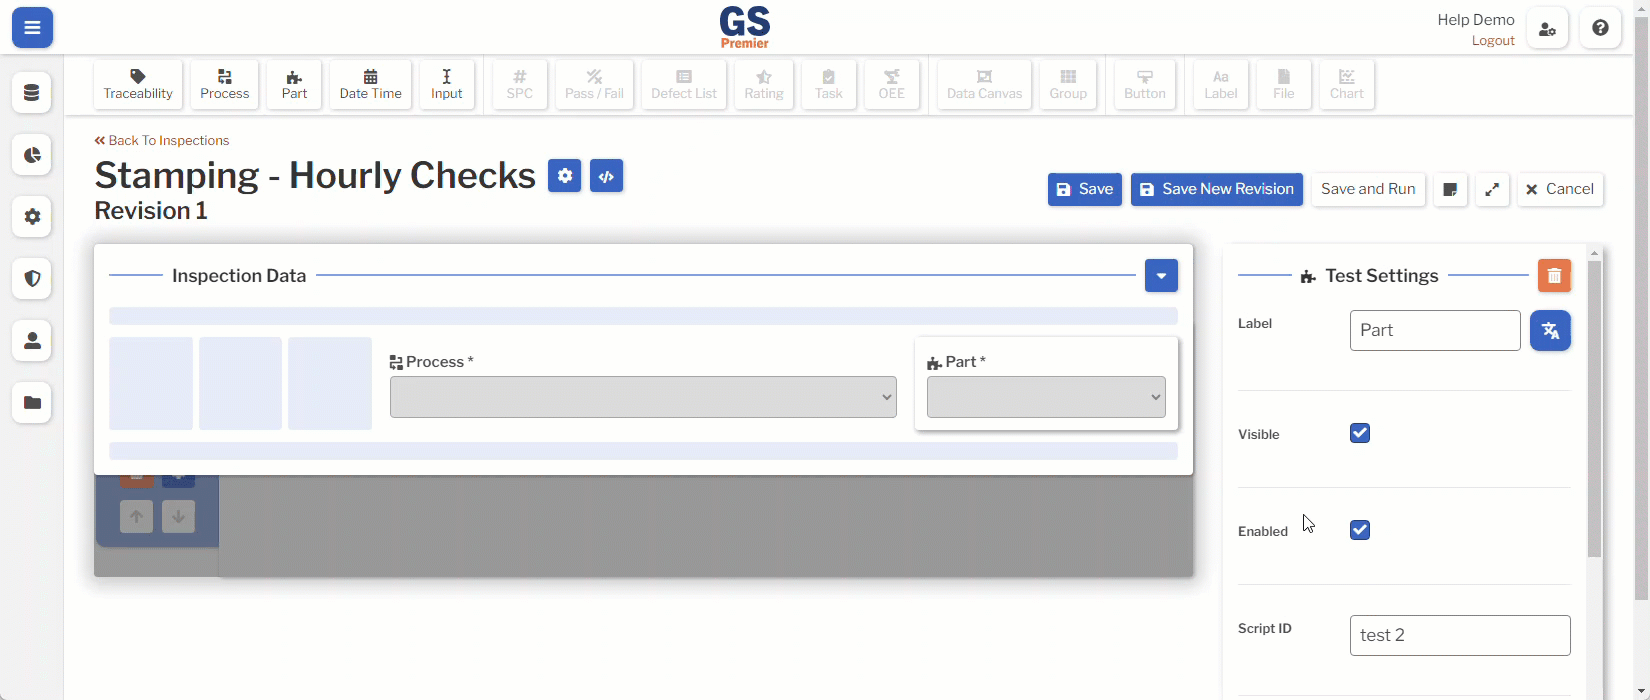
- Select each Test and change its Test Settings as needed.
- Test Settings that are commonly changed include:
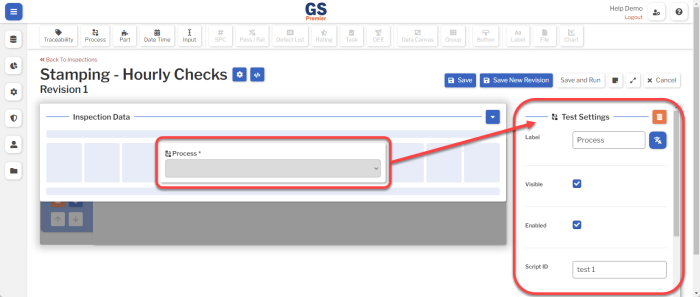
- Process Test:
-
- Process
- You can set the Process for this inspection.
- Enabled
- When Enabled, the data entry inspector can set or change the value of this Test.
- If you set the Process setting (above), you might want to clear this checkbox so that the data entry inspector can't change the Process you have preset.
- Visible
- When Visible, this Test is displayed to the data entry inspector.
- If you set the Process setting (above), you can reduce clutter on the page by clearing this checkbox so that this Test is not displayed to the data entry inspector.
- For other Process Test Settings, see Process Test.
- Process
-
- Part Test:
-
- Part
- You can set the Part for this inspection.
- If you leave this blank, the data entry inspector must choose a Part during data entry.
 Pro tip: To make an inspection that works for multiple Parts, leave this setting blank and do these two things:
- Enabled
- When Enabled, the data entry inspector can set or change the value of this Test.
- If you set the Part setting (above), you might want to clear this checkbox so that the data entry inspector can't change the Part you have preset.

- Visible
- When Visible, this Test is displayed to the data entry inspector.
- If you set the Part setting (above), you can reduce clutter on the page by clearing this checkbox so that this Test is not displayed to the data entry inspector.
- For other Part Test Settings, see Part Test.
- Part
-
- Traceability Test:
-
- Value
- You can set the Traceability value for this inspection.
- Pro tip: To make an inspection that works for multiple Traceability values — for example, multiple Lines, Machines, Shifts, or Operators — do not change this Test Setting.
Instead, preset the Traceability value in one or more of these areas:
- Enabled
- When Enabled, the data entry inspector can set or change the value of this Test.
- If you preset this Traceability via its Value setting (above), Users, Workstations, or Processes, you might want to clear this checkbox so that the data entry inspector can't change the Traceability value you have preset.

- Visible
- When Visible, this Test is displayed to the data entry inspector.
- If you preset this Traceability via its Value setting (above), Users, Workstations, or Processes, you can reduce clutter on the page by clearing this checkbox so that this Test is not displayed to the data entry inspector.
- For other Traceability Test Settings, see Traceability Test.
- Value
-
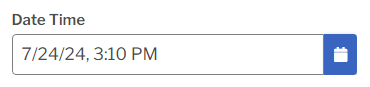
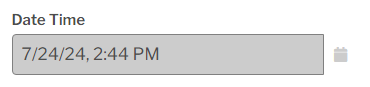
- Date Time Test:
-
- Default to Now
- When this checkbox is cleared (the default setting), this Test is not prefilled with any Date Time value.
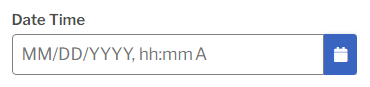
- To prefill this Test with the current Date and Time on the workstation running the inspection, select this checkbox.
- Enabled
- When Enabled, the data entry inspector can set or change the value of this Test.
- If you selected the Default to Now checkbox (above), you might want to clear this checkbox so that the data entry inspector can't change the Date Time.
- Visible
- When Visible, this Test is displayed to the data entry inspector.
- If you selected the Default to Now checkbox (above), you can reduce clutter on the page by clearing this checkbox so that this Test is not displayed to the data entry inspector.
- Required
- When this checkbox is selected (the default setting), this Test must contain a valid Date Time value before the data entry inspector can close the Global tag panel. All data stored by this inspection will be stamped with the same Date Time value.
- To let the data entry inspector close the Global tag panel when the Date Time value is not set, clear this checkbox. If the Date Time value is not set, each Sub-Inspection will store data with the current Date and Time on the workstation when the Sub-Inspection was Submitted.
- For other Date Time Test Settings, see Date Time Test.
- Default to Now
-
- Process Test:
- (On a PC only): Move and resize the Tests on the Global tag panel as desired.
-
- To move a Test, drag it to any blue placeholder.
- To resize a Test, click and drag the left or right edge to the desired width. The Test will automatically adjust to fill the nearest blue placeholder.
- To move a Test, drag it to any blue placeholder.
-
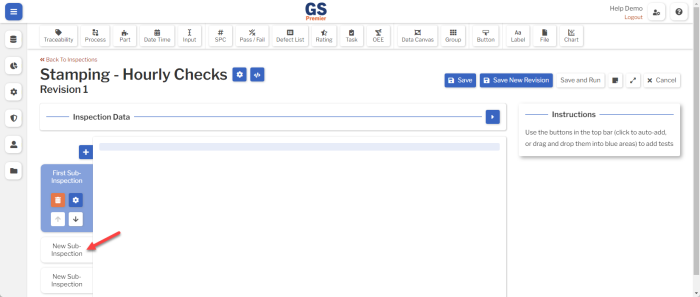
C. Create Sub-Inspections and set their Names
A Sub-Inspection is one page of data entry Tests that will be stored in GS when the data entry inspector Submits the sub-inspection.
Every Inspection contains one or more Sub-Inspections, and every Sub-Inspection contains one or more Tests.
- Plan how many Sub-Inspections to use in this Inspection.
- Consider factors such as:
- Logical groups of Tests.
- For example, you might create Sub-Inspections for Visual checks, Dimensional checks, Chemical Analysis, etc.
- Tasks that must be performed in a particular order.
- For example, you might create a Sub-Inspection for each major step in an Assembly process.
- The length of each data entry page.
- For example, you might try to limit each Sub-Inspection to the number of Tests that fit on a typical screen without needing to scroll up or down.
- Fixtures that use multiple Serial Devices to simultaneously measure multiple Characteristics on each Part.
- All of the SPC Measurement Tests for these Characteristics should be added to the same Sub-Inspection.
- Logical groups of Tests.
- Consider factors such as:
- If using more than one Sub-Inspection, create additional Sub-Inspections.
- Select the Add Sub-Inspection button
 to create each new Sub-Inspection.
- Select the Add Sub-Inspection button
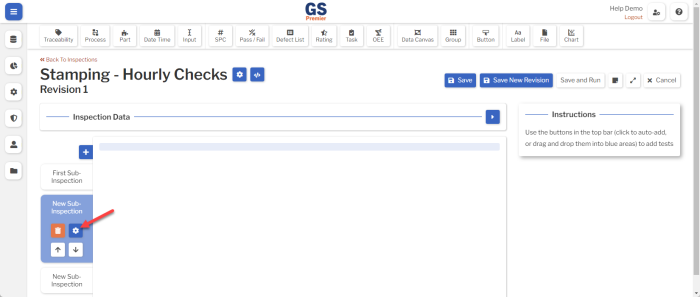
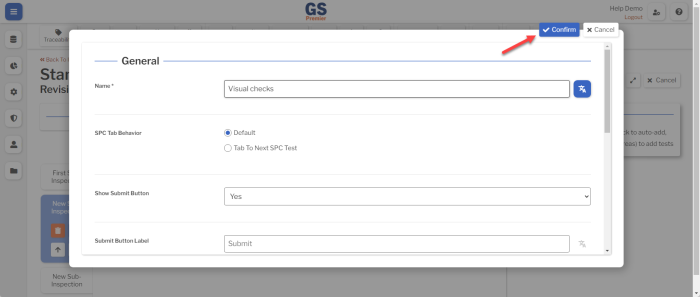
- Set the Name of each Sub-Inspection.
-
- Select the tab for the desired Sub-Inspection.
- Select the Edit Sub-Inspection button
 to change the Sub-Inspection's settings.
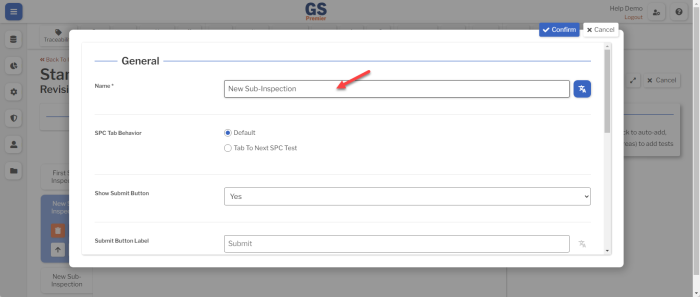
- Edit the Name setting.
- Select the Confirm button
 at the top or bottom of the page to save your change.
- Select the tab for the desired Sub-Inspection.
-
D. Add Tests to each Sub-Inspection
Tests are objects that you can place on a Sub-Inspection or on the Global tag panel.
For detailed information about each kind of Test and its settings, see Tests Overview.
How to add a Test to a Sub-Inspection
- (On a PC or tablet): Select the Test you want to add. It will automatically be added to the current Sub-Inspection.
- (On a PC only): Alternatively, you can drag the Test and drop it on a blue placeholder:
How to move and resize Tests on a Sub-Inspection
(On a PC only) You can move and resize the Tests on the current Sub-Inspection as desired.
- To move a Test, drag it to any blue placeholder.
- To resize a Test, click and drag the left or right edge to the desired width. The Test will automatically adjust to fill the nearest blue placeholder.
1. (optional) Traceability, Process, Part, and Date Time Tests

When the data entry inspector Submits a Sub-Inspection that contains any of these Tests, the values of these Tests will only be applied to that Sub-Inspection.
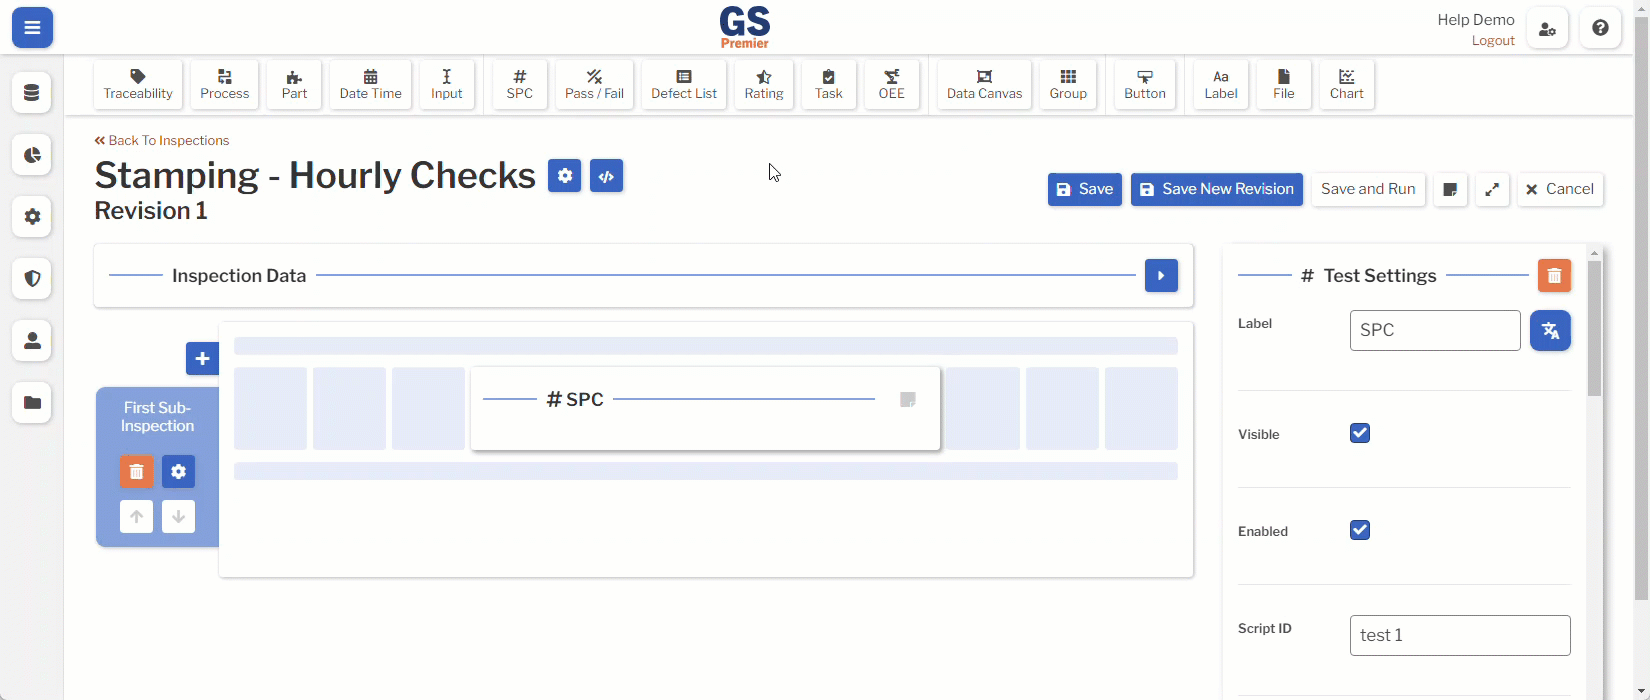
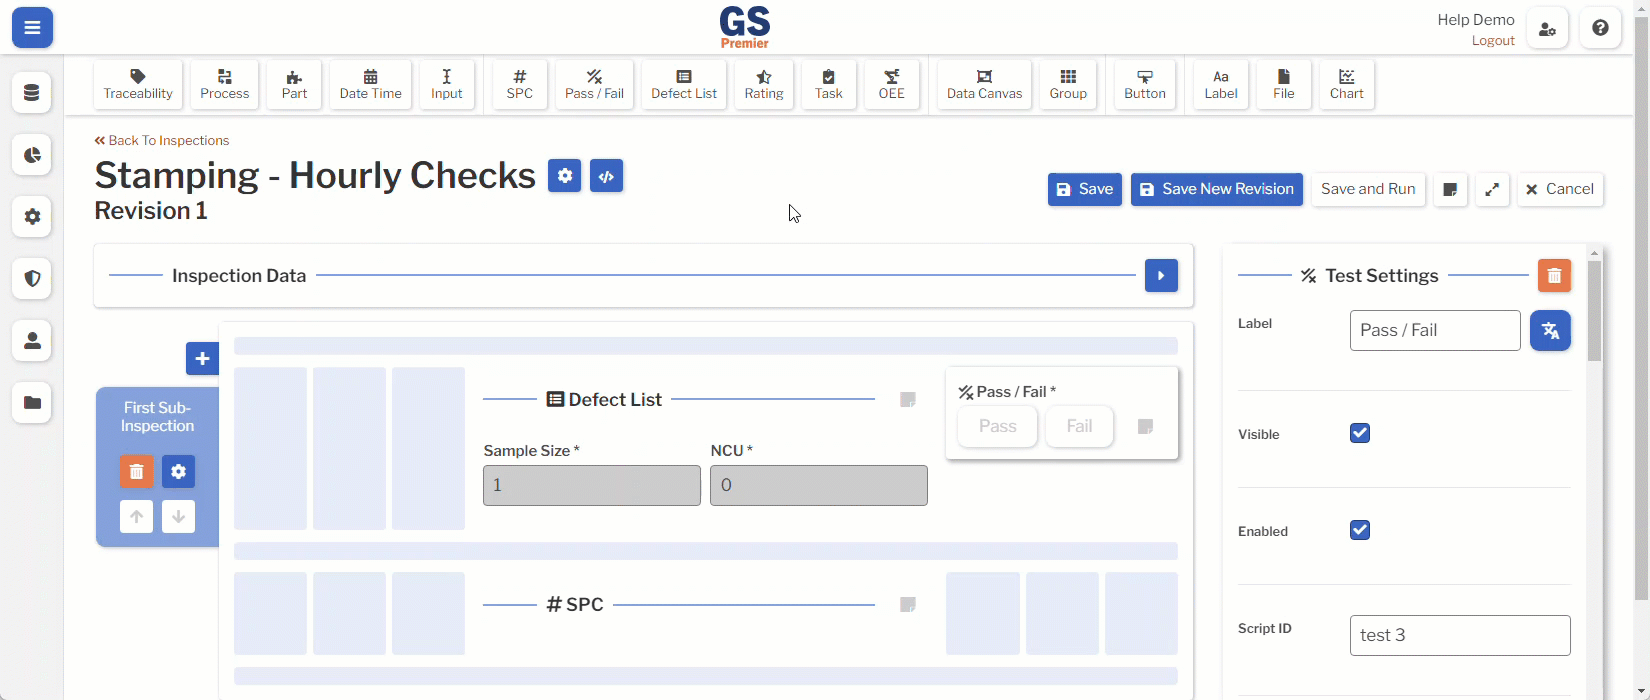
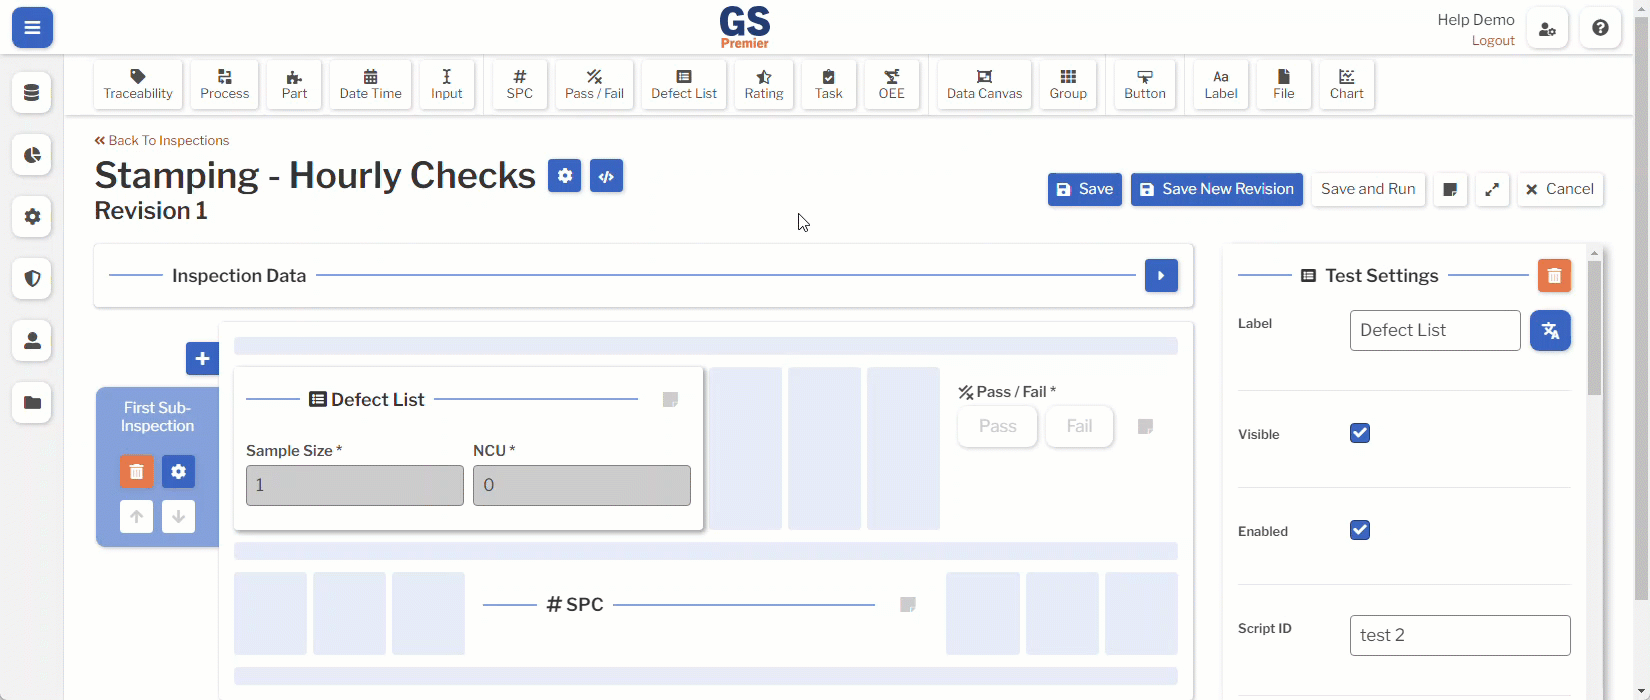
2. Tests that store data records
Each of these Tests — SPC, Pass/Fail, Defect List, Rating, Task, and OEE — will store a data record in GS when the Sub-Inspection is Submitted.

After adding one of these Tests to the Sub-Inspection, you can change its Test Settings as needed.
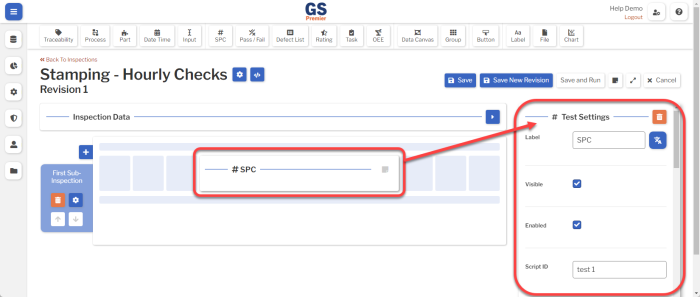
This Test stores measurements for a Characteristic of a Part.

![]() You will typically specify the Part via a Part Test on the Global tag panel.
You will typically specify the Part via a Part Test on the Global tag panel.
SPC Test Settings that are commonly changed include:
- (required) Characteristic Match Method
- This determines how you will set the Characteristic for this Test.
- Static Characteristic
- Use the Characteristic setting to choose one Characteristic of one Part.
- This Test will be limited to storing data for that Characteristic of that Part.
- Match by Part and Tag
- This option lets you make an inspection that works for multiple Parts.
- Use the Tag setting to choose a Tag that identifies what is being measured, regardless of the Part.
- If the current Part does not have a Characteristic with this Tag, this Test will not be displayed.
- Static Characteristic
- This determines how you will set the Characteristic for this Test.
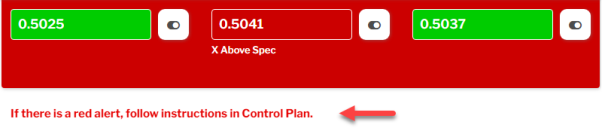
- Alert
- You can choose an Alert that will automatically send a text message or email if this Test detects a real time failure.
- Serial Device
- If you have a Serial Device connected to the computer's serial port or USB port for direct entry of measurement data, you can select it here.
This Test stores Pass/Fail data for a specific Defect.

Pass/Fail Test Settings that are commonly changed include:
- (required) Defect
- Select the Defect that you want the data entry inspector to look for.
- Sample Size
- Specify the number of items that will be inspected for this Defect.
 Sample Size is used to report statistics such as Yield, ratios of Defective parts to Total parts (such as Percent NCU, PPM, and NCU Sigma), and ratios of Total Defects to Total parts (such as Percent Defects, DPM, and Defect Sigma).
- NCU Count on Failure
- Specify the number of bad parts to store in GS if the Defect is found and the inspector Fails this Test.
- NCU is used to report statistics such as Yield, Percent NCU, Percent Good, PPM, and NCU Sigma.
- Alert
- You can choose an Alert that will automatically send a text message or email if this Test detects a real time failure.
- Only Show if the Part Contains this Defect
- If the current Part is not assigned to any Defect Categories that contain this Defect, this Test will not be displayed.
- This lets you make an inspection that works for multiple Parts.
This Test stores Defect data.
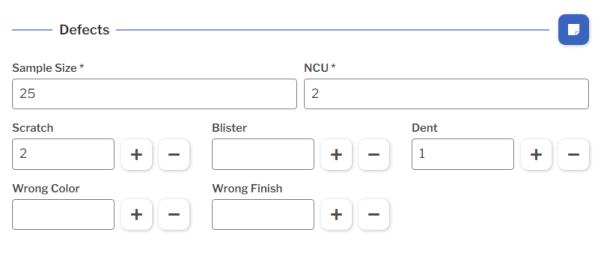
Defect List Test Settings that are commonly changed include:
- (required) Defect Category
- Select the Defect Category that contains the Defects you want the data entry inspector to look for.
- Sample Size
- Specify the number of items that will be inspected for this Defect.
- Sample Size is used to report statistics such as Yield, ratios of Defective parts to Total parts (such as Percent NCU, PPM, and NCU Sigma), and ratios of Total Defects to Total parts (such as Percent Defects, DPM, and Defect Sigma).
- Alert
- You can choose an Alert that will automatically send a text message or email if this Test detects a real time failure.
- Enable Sample Size
- When Enabled, the data entry inspector can set or change the Sample Size during data entry.
- If the data entry inspector always checks the same number of items for these defects, you might want to clear this checkbox so that the data entry inspector can't change the Sample Size you have preset.
- NCU Behavior
- To let the data entry inspector manually enter the number of bad parts (NonConforming Units or NCU), choose User Input.
- To let GS automatically set the number of bad parts (NCU) equal to the number of Defects found in the Sample, choose Auto Sum. You should only choose this option if one bad part can be assigned a maximum of one Defect.
- NCU is used to report statistics such as Yield, Percent NCU, Percent Good, PPM, and NCU Sigma.
This Test uses a Likert rating to store Defect data.

Rating Test Settings that are commonly changed include:
- (required) Options
- This is where you set up the buttons for this Test.
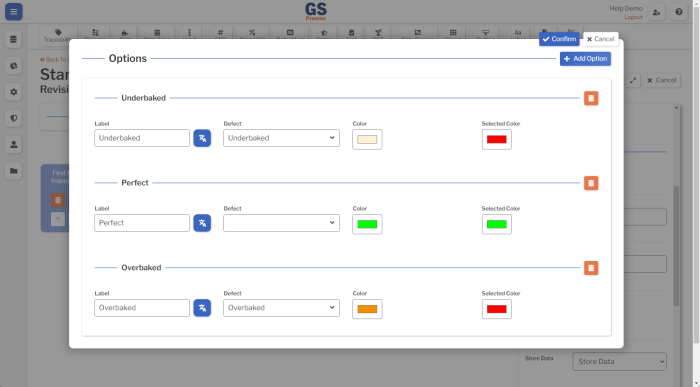
- This Test can have any number of ratings.
- To add another rating, select the Add Option button
 .
. - To delete a rating, select its Delete Option button
 .
.
- To add another rating, select the Add Option button
- For each imperfect rating, select its corresponding Defect.
- For each rating, select the Color of the button that is displayed to the data entry inspector and the Selected Color to display if the inspector selects that Rating.
- When finished, select the Confirm button at the top of the window.
- This Test can have any number of ratings.
- Sample Size
- Specify the number of items that will be inspected for this Test.
- Sample Size is used to report statistics such as Yield, ratios of Defective parts to Total parts (such as Percent NCU, PPM, and NCU Sigma), and ratios of Total Defects to Total parts (such as Percent Defects, DPM, and Defect Sigma).
- NCU Count on Failure
- Specify the number of bad parts to store in GS if the inspector selects a Rating with a Defect.
- NCU is used to report statistics such as Yield, Percent NCU, Percent Good, PPM, and NCU Sigma.
- Alert
- You can choose an Alert that will automatically send a text message or email if this Test detects a real time failure.
- Buttons Per Row
- You can set how to break the rating buttons into rows.
This Test stores Task data for the task you define. You can require the inspector to complete the task before submitting the Sub-Inspection.

Task Test Settings that are commonly changed include:
- Label
- The task label displayed to the data entry inspector and stored in GS.
- Text to Store
- The task description to store in GS.
- Require Sign-Off
- This requires an authorized user to select their User name and enter their PIN before completing this task.
- If requiring sign-off, you must authorize at least one of the Sign-Off Roles for sign-off. For routine tasks you might authorize all Roles, while for special situations you might only authorize Roles with higher privileges like Supervisors and Engineers.
This Test stores OEE data.

OEE Test Settings that are commonly changed include:
- Track Availability
- If set to Enter Downtime with Reasons, you must also set the Availability Defect Category to a Defect Category that contains Availability defects. During data entry, the inspector can enter the Downtime minutes caused by each Availability defect.
- If set to Enter Available Time, the inspector can enter the Available Time in minutes.
- To avoid tracking Availability and Downtime, set this to Do Not Track.
- (required) Scheduled Time (Minutes)
- The minutes of Scheduled Time for the data collection period (typically an hour or a work shift).
- If the Track Availability setting (above) is set to Do Not Track, this setting is not required.
- Track Performance
- If selected, you must also set the Cycle Time to the number of minutes required to produce one part under ideal conditions.
- Track Quality
- If set to Enter Bad Parts with Defects, you must also set the Quality Defect Category to a Defect Category that contains Quality defects. During data entry, the inspector can enter the number of bad parts attributed to each Quality defect.
- If set to Enter Good Parts, the inspector can enter the number of Good parts produced.
- To avoid tracking Quality, set this to Do Not Track.
- Alert
- You can choose an Alert that will automatically send a text message or email if this Test detects a real time failure.
* Not shown in GS Essential.
3. (optional) Data Canvas
You can use the Data Canvas to enter data directly on an image of a part or process.
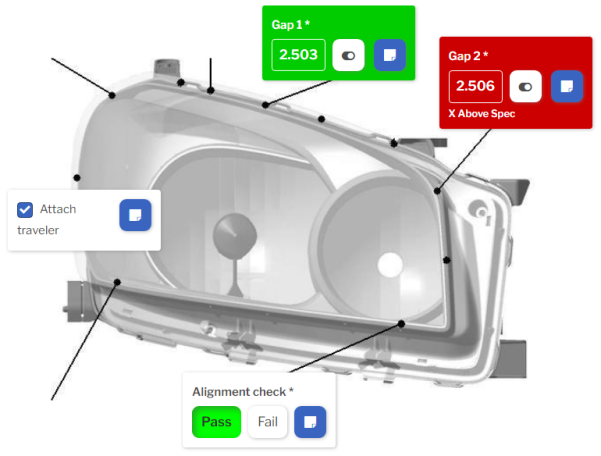
If you want to use a Data Canvas:
- Add this Test to the sub-inspection and set its Background Image property.
- Add data Tests and Label Tests by dragging and dropping a new Test from the toolbar or an existing Test from the sub-inspection onto the Data Canvas.
- On the Data Canvas, drag the Tests to the locations where you want to display them to the data entry inspector.
4. (optional) Charts
You can display charts for the data being entered on the sub-inspection.
To do so:
- Add the data Tests to the sub-inspection.
- Add a Chart Test to the sub-inspection and set its Data Type property.
- Set the chart's Linked Tests property to select one or more Tests whose data you want to display on the chart.
- For each linked data Test, GS will retrieve the last 25 data records going back one year.
- Set the chart's Chart Type property to the type of chart you want to display.
5. (optional) Instructions
You can use Label Tests to display text instructions and File Tests to display images, pdfs, and web pages on the Sub-Inspection.
To add text instructions to the Sub-Inspection, add a Label Test and set its Content property to the formatted text you want to display.
File Test
To add images, pdfs, other browser-compliant files, and web pages to the Sub-Inspection, add a File Test to the sub-inspection and set its Type property.
- If you set the Type to File, edit the File property and choose the file to display.
- You should only choose a file type that your browser can display — such as an image, pdf, or html file. (Some browsers may not be able to display file types like Microsoft Word or Microsoft Excel.)
- If you set the Type to URL, set the URL property to the web address you want to display.
To reduce clutter on this page, you can select the Open in New Tab checkbox and set the Label to indicate which file or URL will be opened in a new page.
E. Save and Test the Inspection Revision
Saving the Inspection Revision
![]() Pro tip: Best practice is to select the Save button periodically while editing the Inspection.
Pro tip: Best practice is to select the Save button periodically while editing the Inspection.

After making a major change to the Inspection — especially if you have changed something with complicated settings or deleted something — you might want to select the Save New Revision button and give the new revision a new name. This lets you go back to the previous revision if needed.

Switching to Developer Mode
![]() Pro tip: When you are ready to test your inspection, best practice is to select the Settings button and change the Script Mode to Developer Mode. Any data you enter in Developer Mode is specially flagged and automatically deleted after several days.
Pro tip: When you are ready to test your inspection, best practice is to select the Settings button and change the Script Mode to Developer Mode. Any data you enter in Developer Mode is specially flagged and automatically deleted after several days.
Testing and Refining your Inspection
To test your Inspection, select the Save and Run button.

This will run your Inspection on a new browser tab, where you can see what a data entry inspector would see when running the inspection.
When you are ready to edit your Inspection, close the new browser tab to return to the tab where you are editing the Inspection Revision.
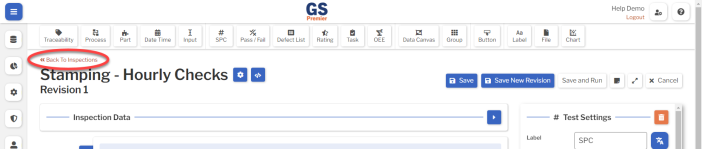
After you have finished editing, saving, and testing the Inspection, select the Back to Inspections link and change from Developer Mode back to Production Mode.
F. Publish your Inspection Revision
Before anyone can run your new inspection, you must publish an Inspection Revision.
Optionally, you can also assign this Inspection to certain Users or Groups and set an Inspection Schedule.
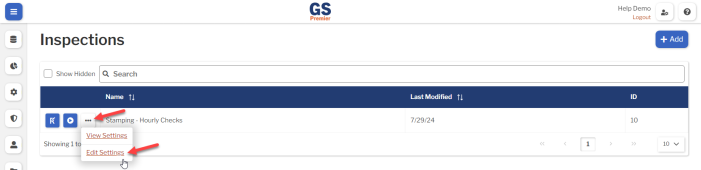
- On the Inspections page, select the More Actions button
 for your new Inspection and then select Edit Settings.
- (optional) To assign this Inspection to only certain Groups or Users, use the Groups Assignments and Users Assignments areas to Add Groups and Add Users so they can run this Inspection.
- If this Inspection is not assigned to any Groups or Users, then all Users with a Data Entry or Supervisor role can run this Inspection. (Users with an Admin or Engineer role can run all inspections without being assigned to them.)
- (optional) You can set up Inspection Schedules that requires this Inspection to be run on a regular basis. To do so, select the Add button
 in the Inspection Schedules area.
- With an Inspection Schedule set, GS will alert any logged-in User who can run that Inspection that it is time to enter data on that Inspection. The User can select that alert to run the Inspection.
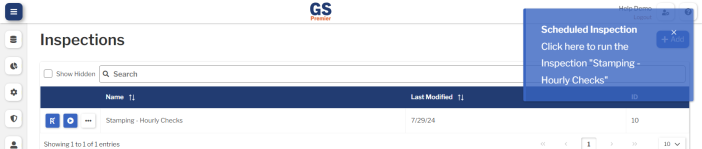
- When the User selects these scheduled alerts — or fails to do so — GS will store Accountability data that lets you analyze User compliance with data entry schedules.
- (required) In the Revisions area, set the Published Revision to the Revision that has been finalized for Users to run.
- Then select the Save button at the top or bottom of the page to save your changes.
- Train your data entry inspectors how to run this Inspection from the Inspections link on the GS home page, the Data Entry section of the navigation menu , or an alert for a Scheduled Inspection.
More
These are the most common steps to create a basic Inspection.
For a full reference, see Creating and editing Inspections, Inspection Revisions, Global tag panel, Sub-Inspections, Tests, and Inspection Scripts.